📕 Prefer to read instead? Keep scrolling for the full tutorial with screenshots and explanations.
1. TrueChecks Alert Optimization
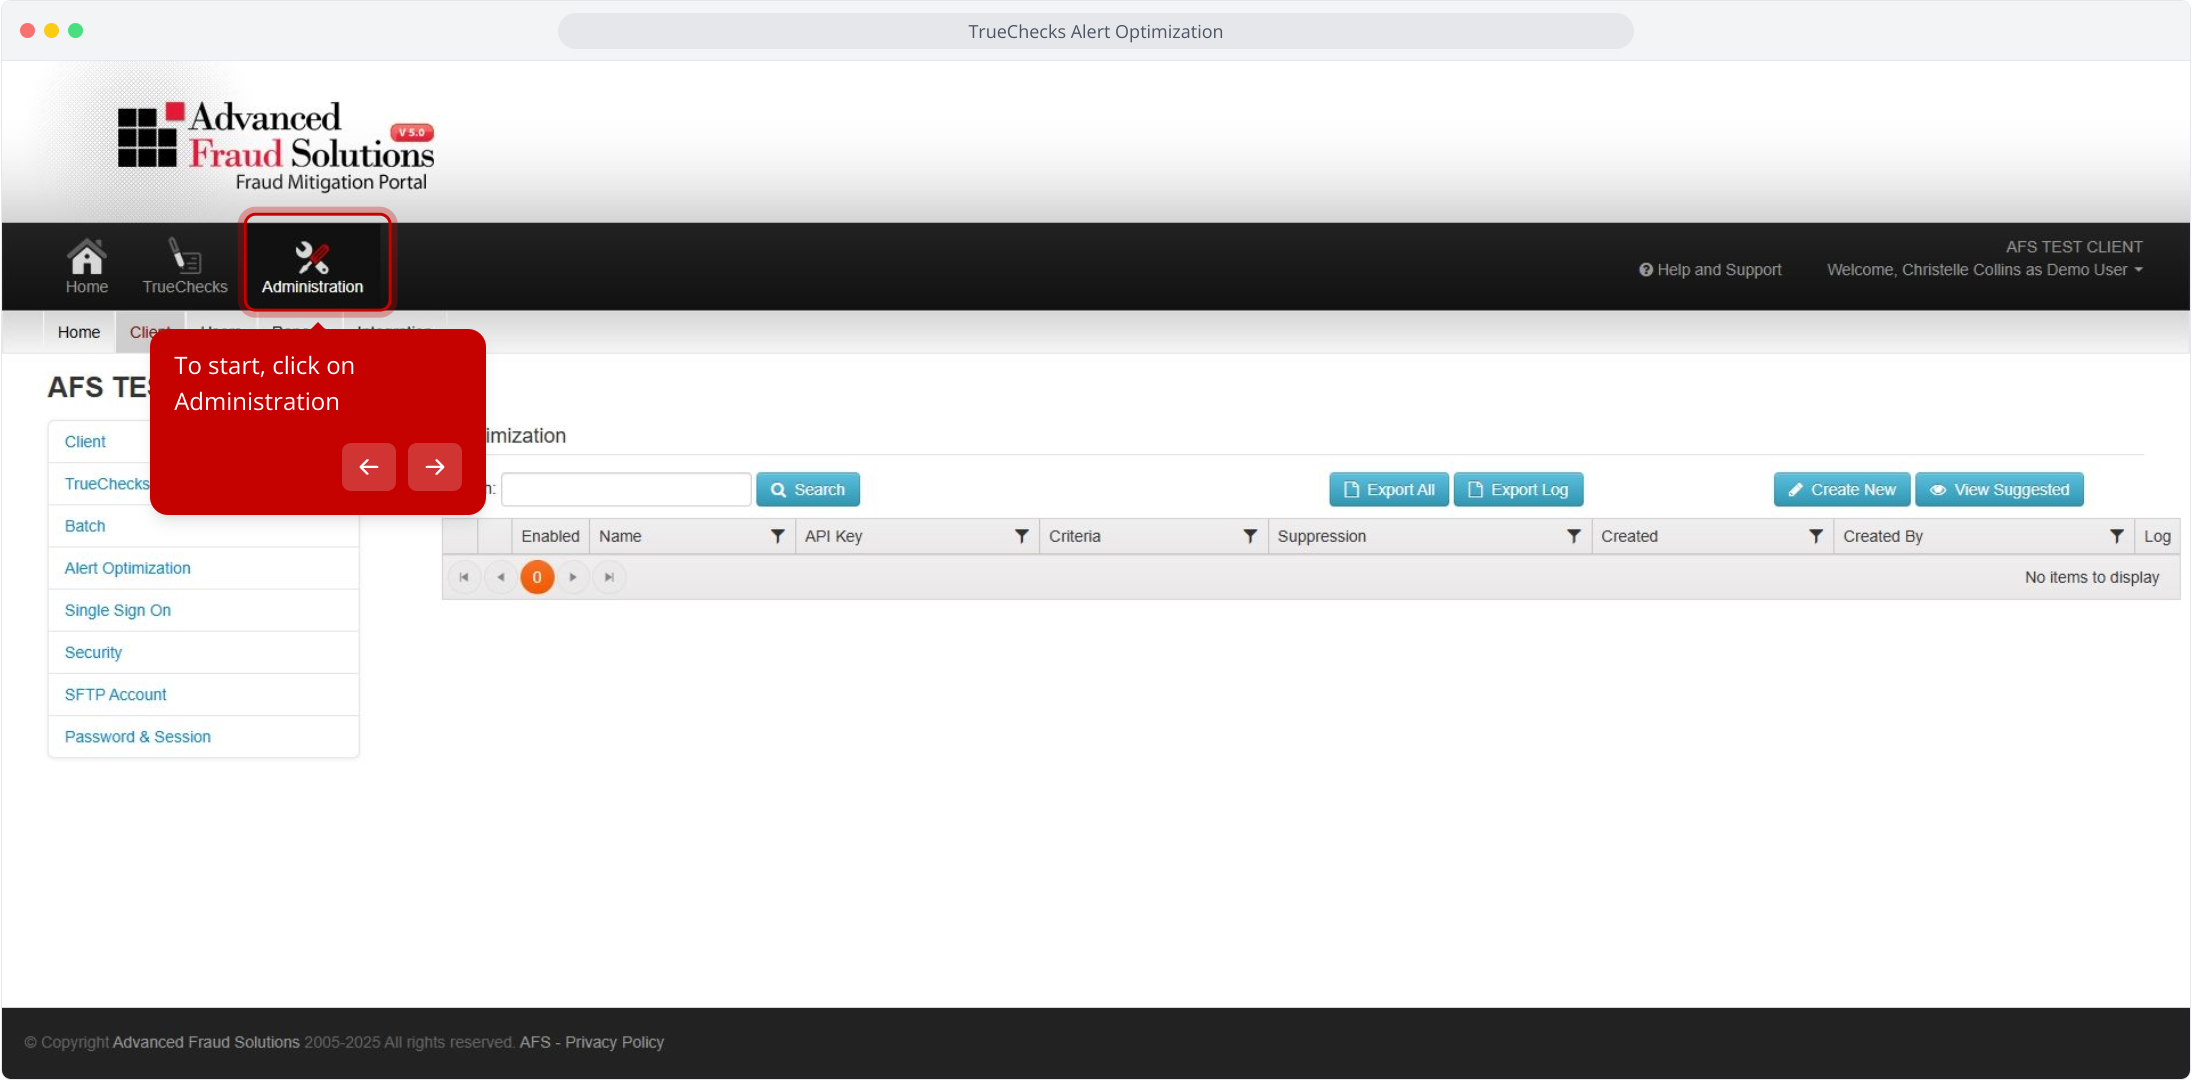
2. To start, click on Administration
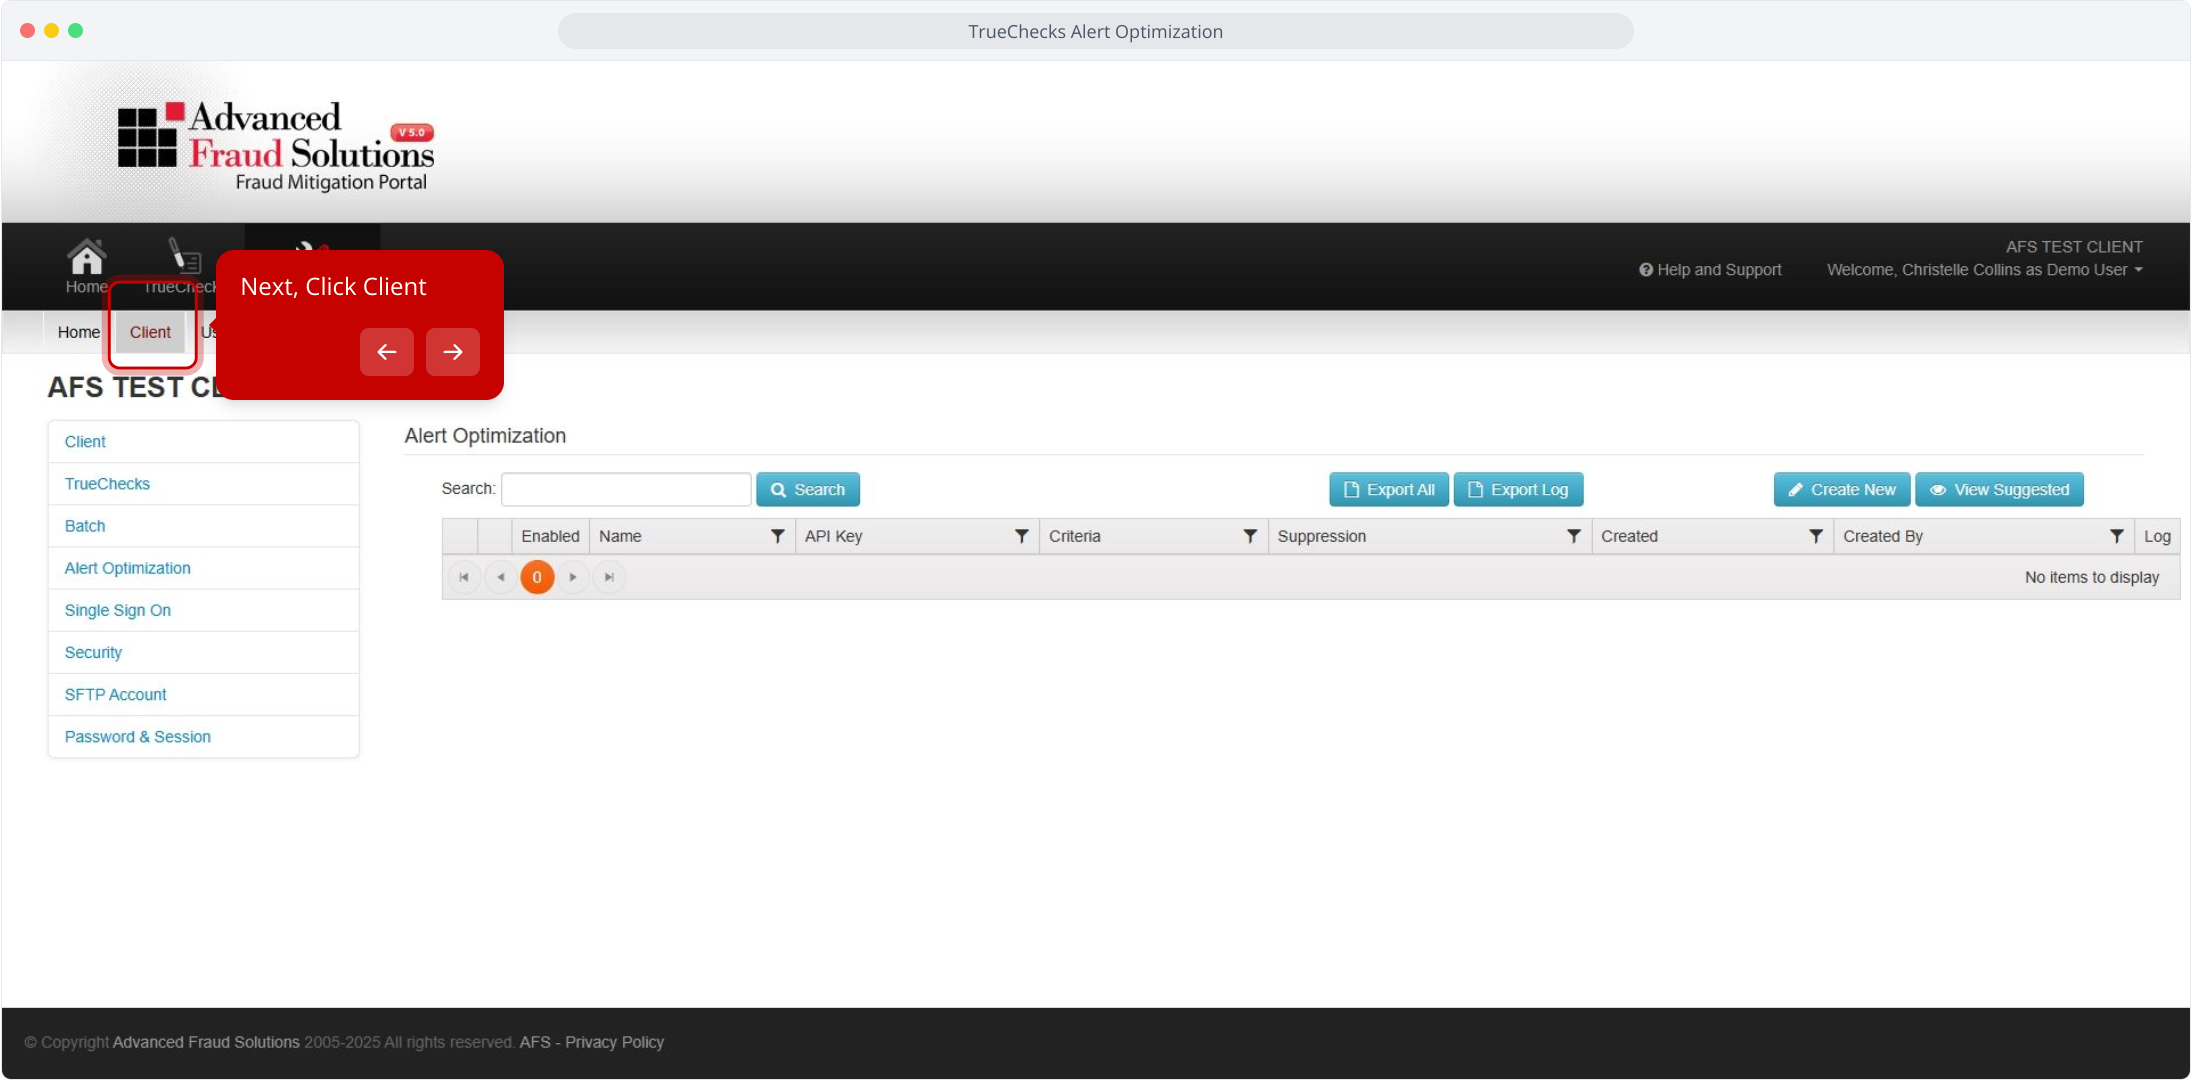
3. Next, Click Client
4. Last, Click Alert Optimization
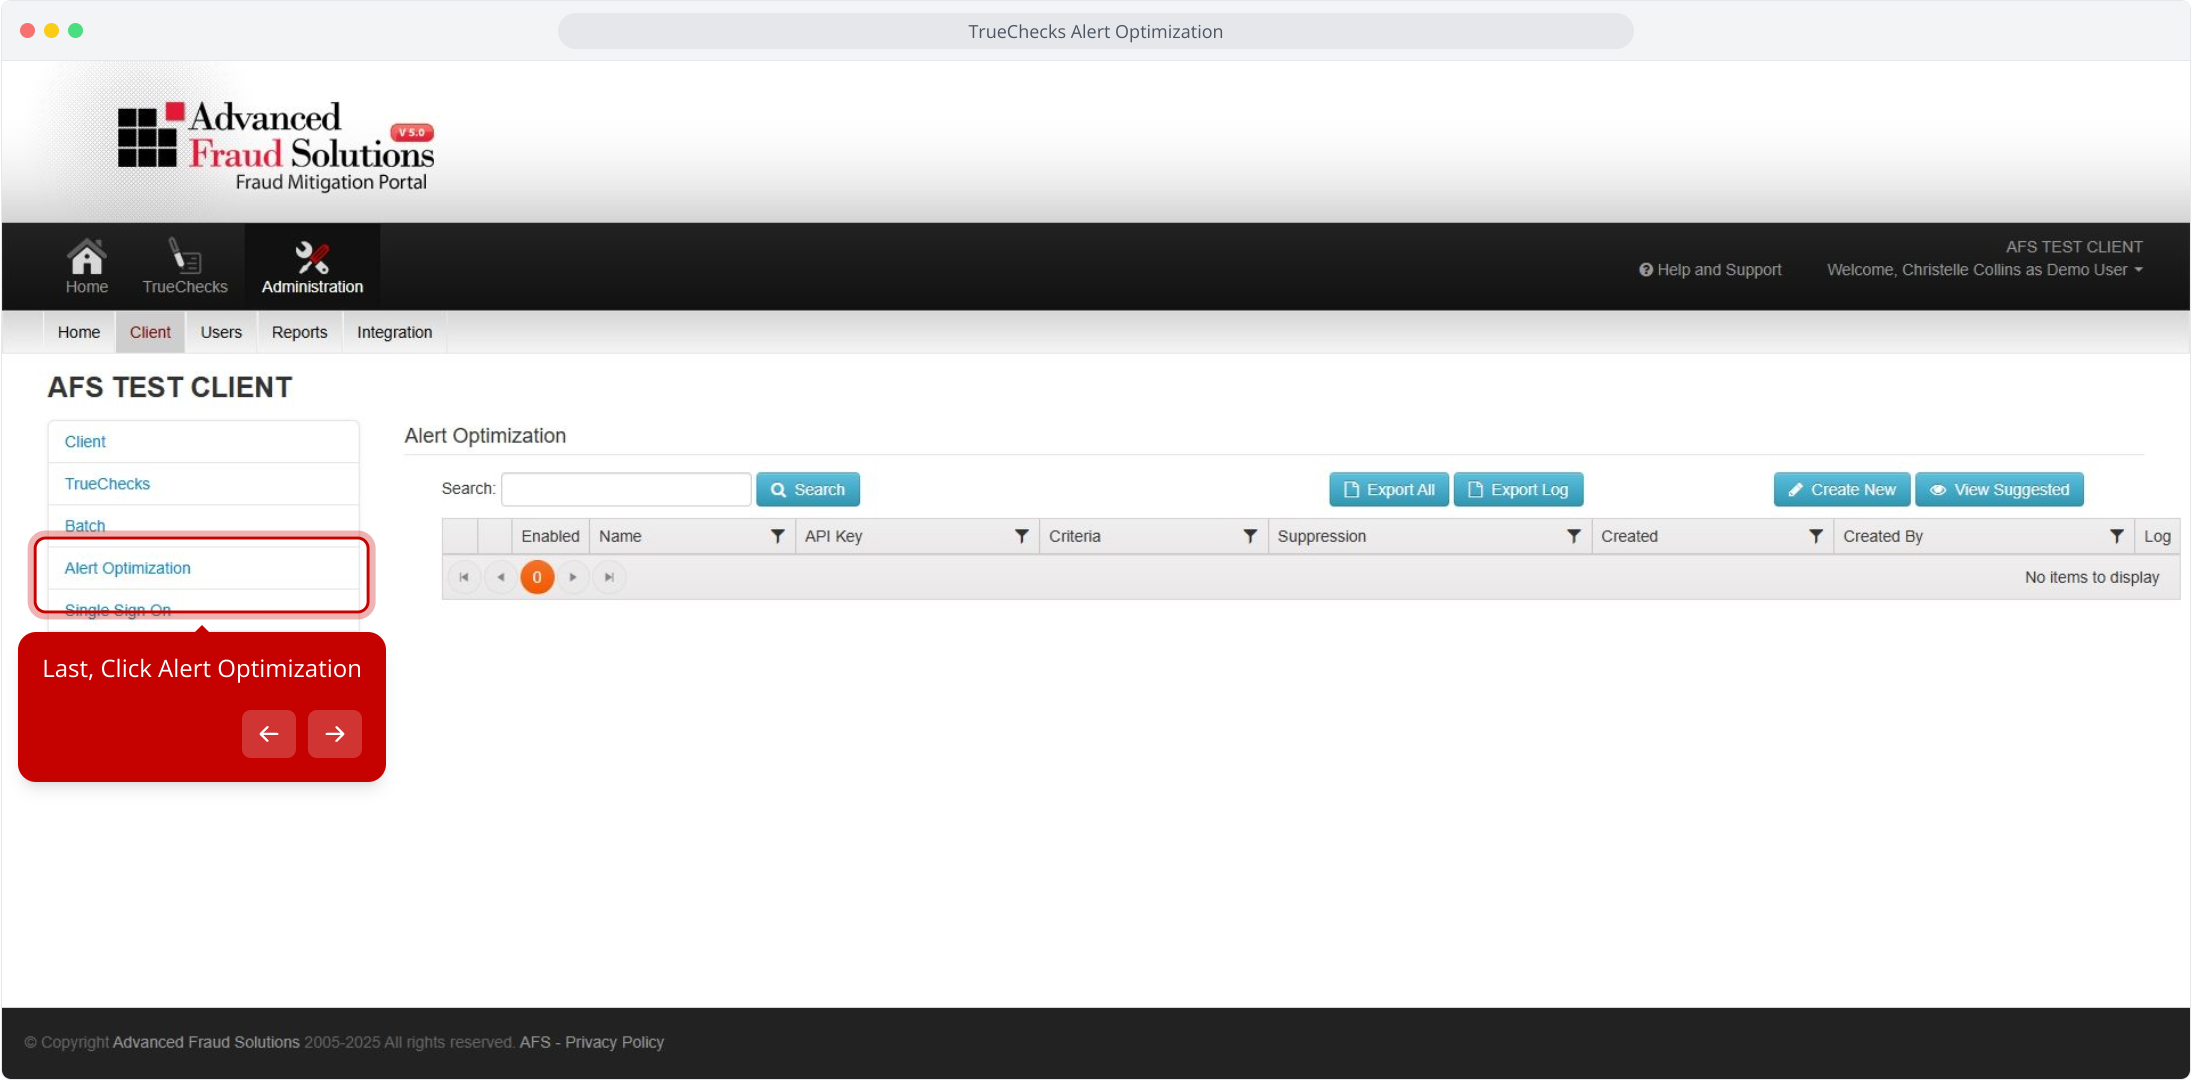
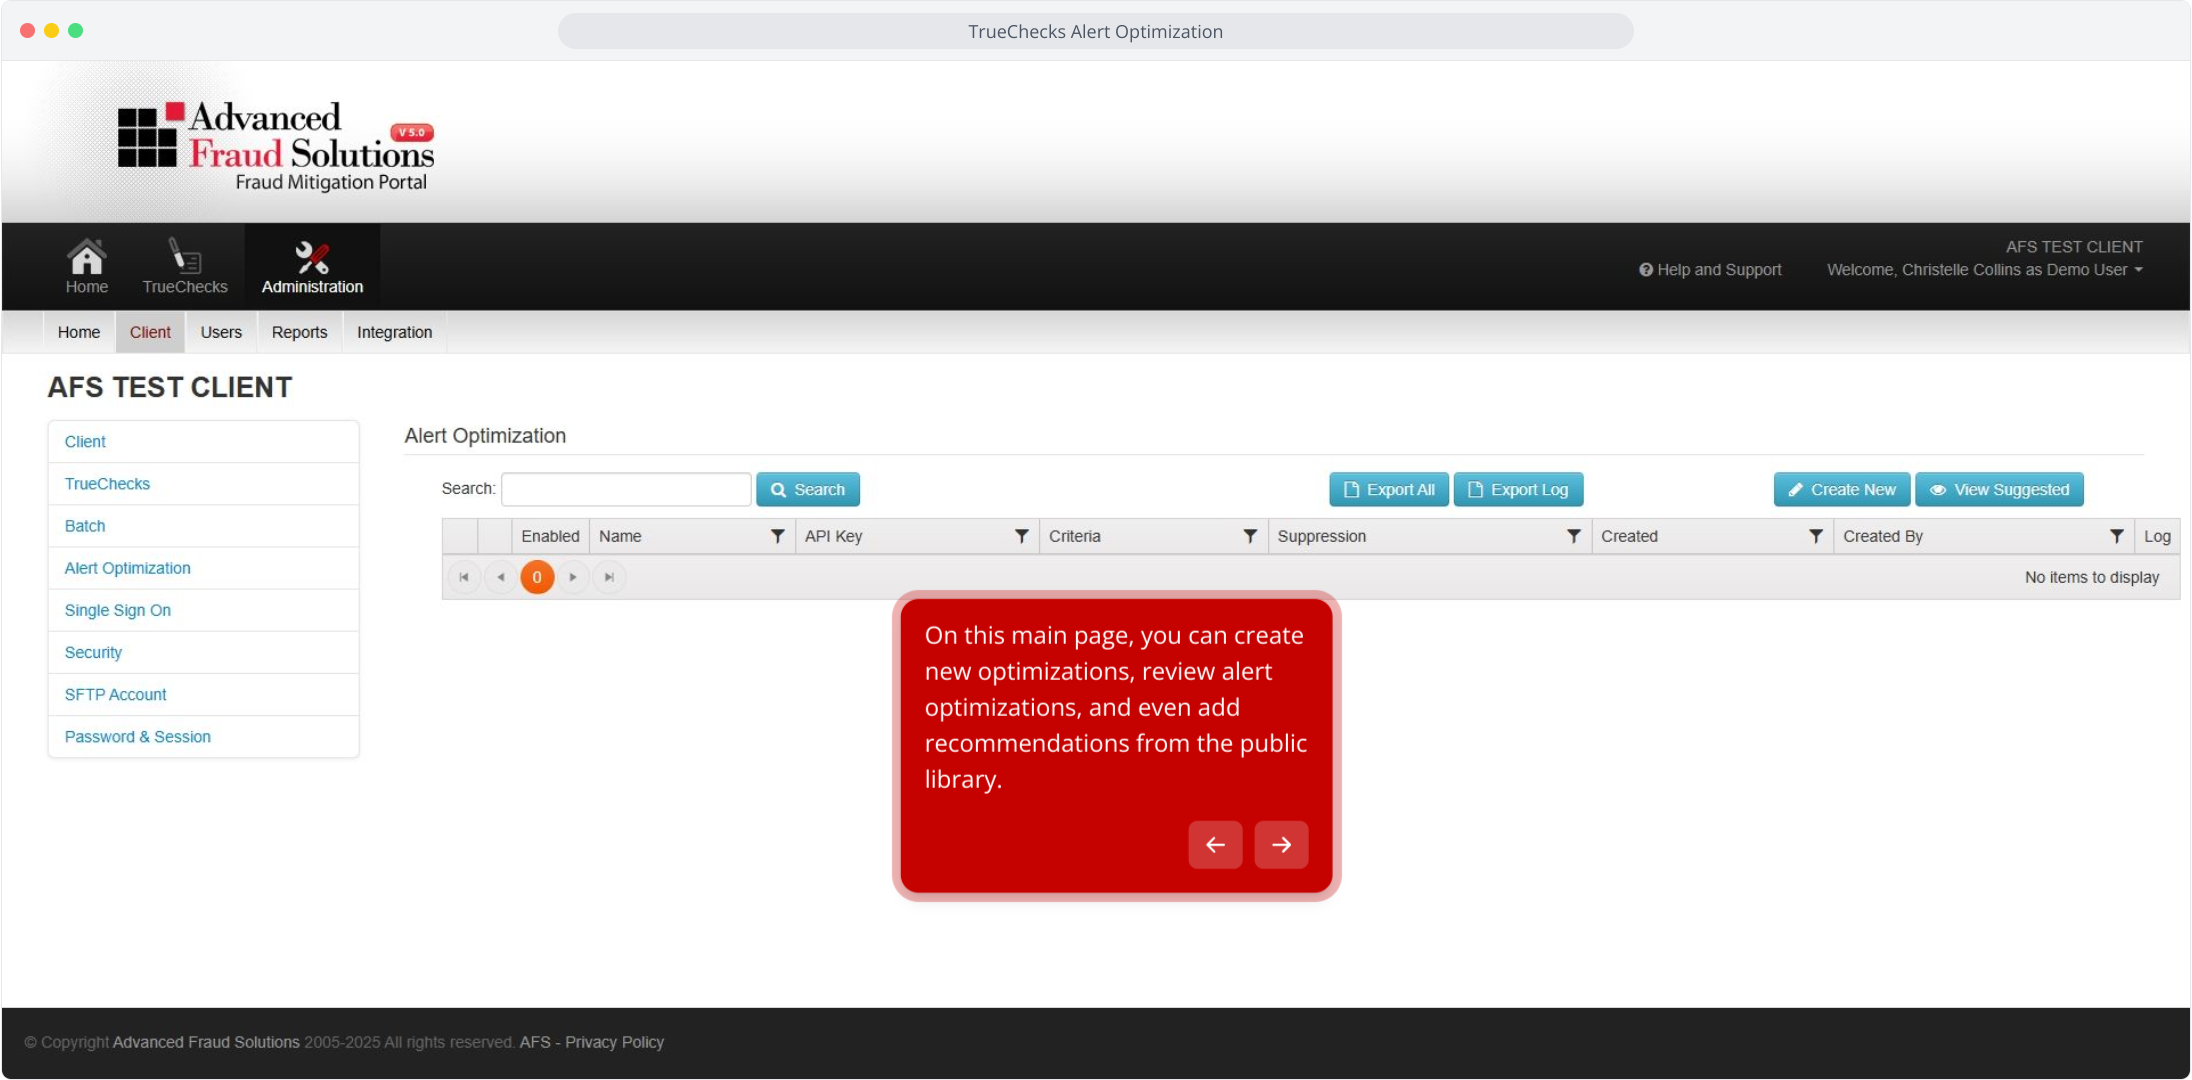
5. On this main page, you can create new optimizations, review alert optimizations, and even add recommendations from the public library.
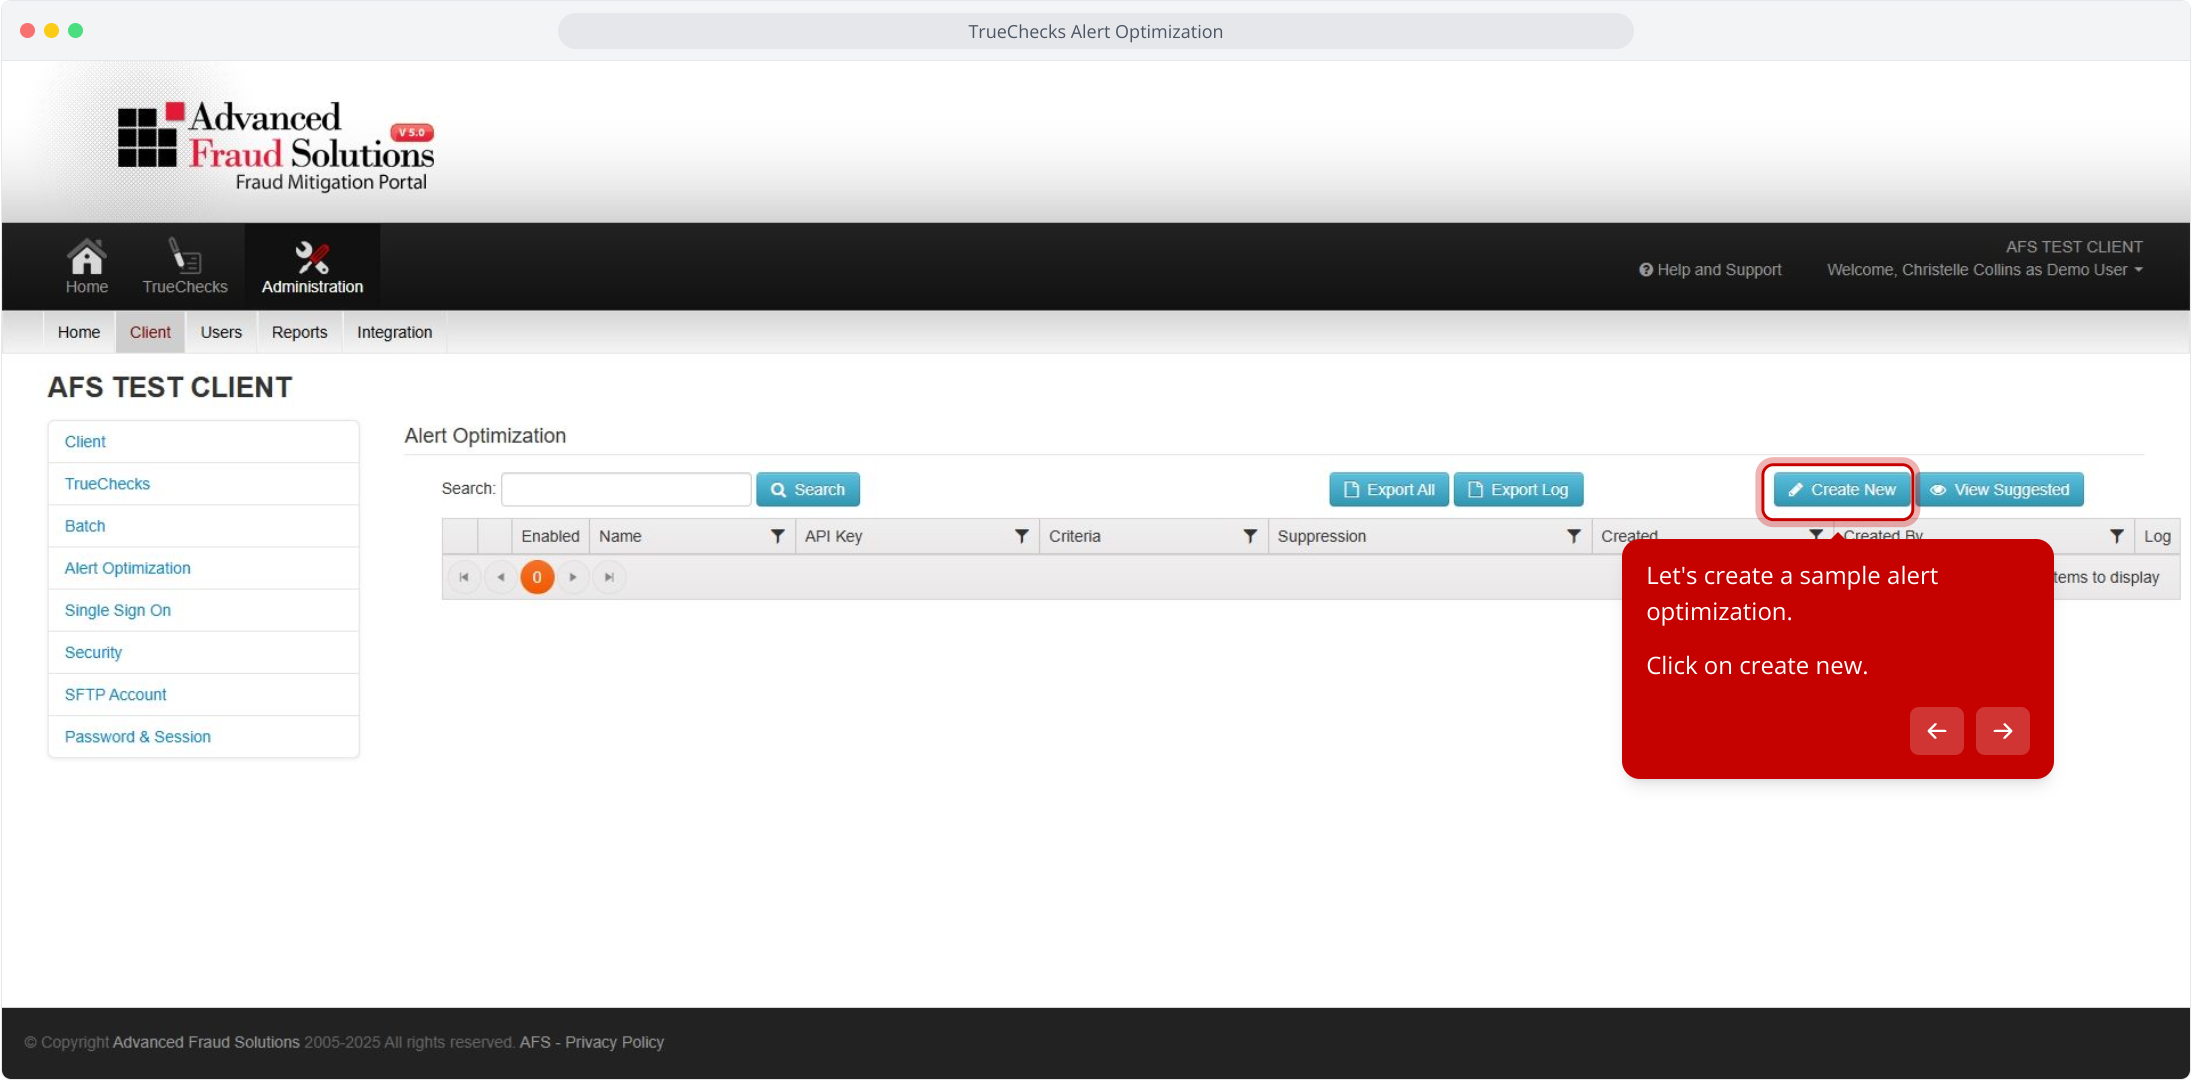
6. Let's create a sample alert optimization.
Click on create new.
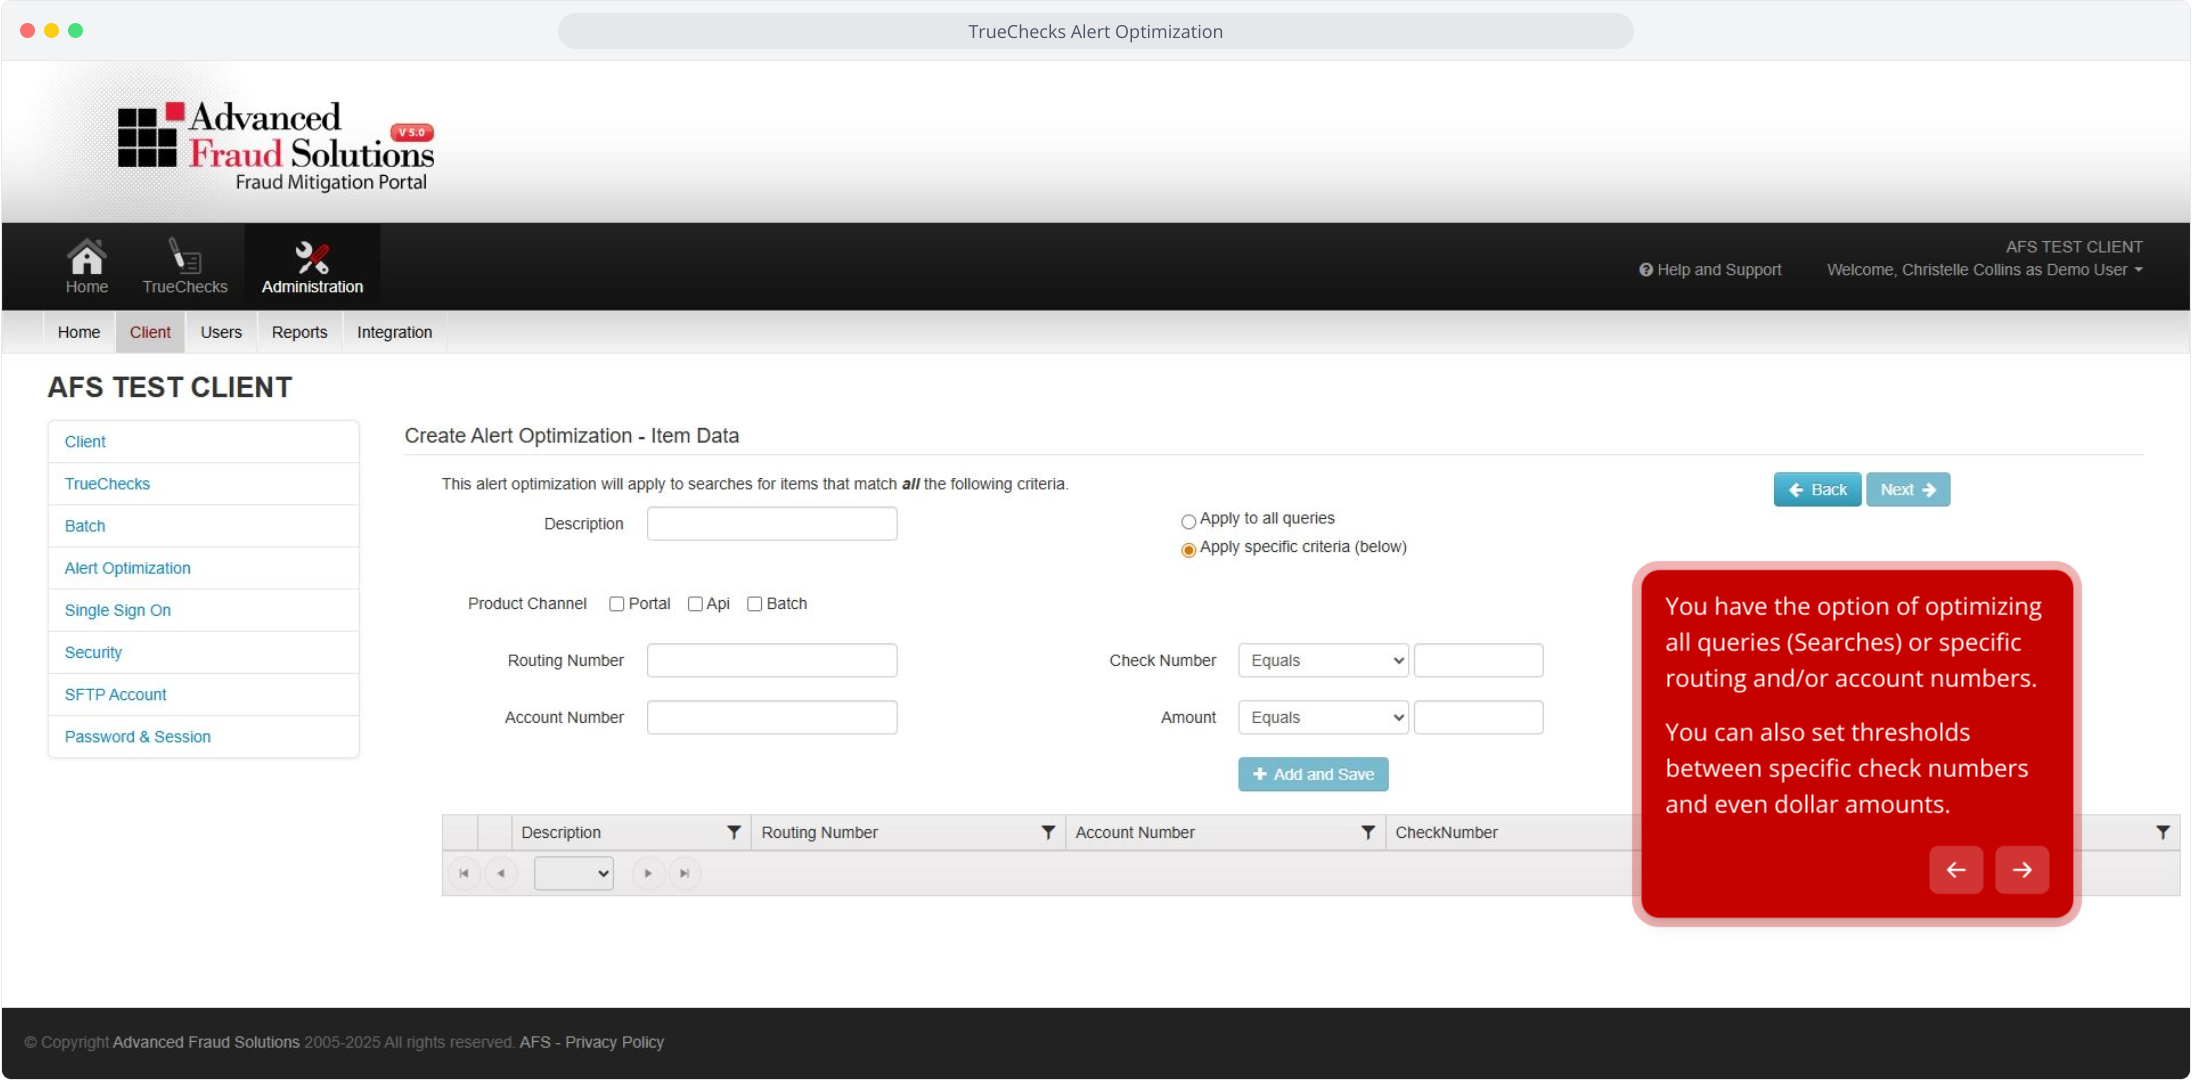
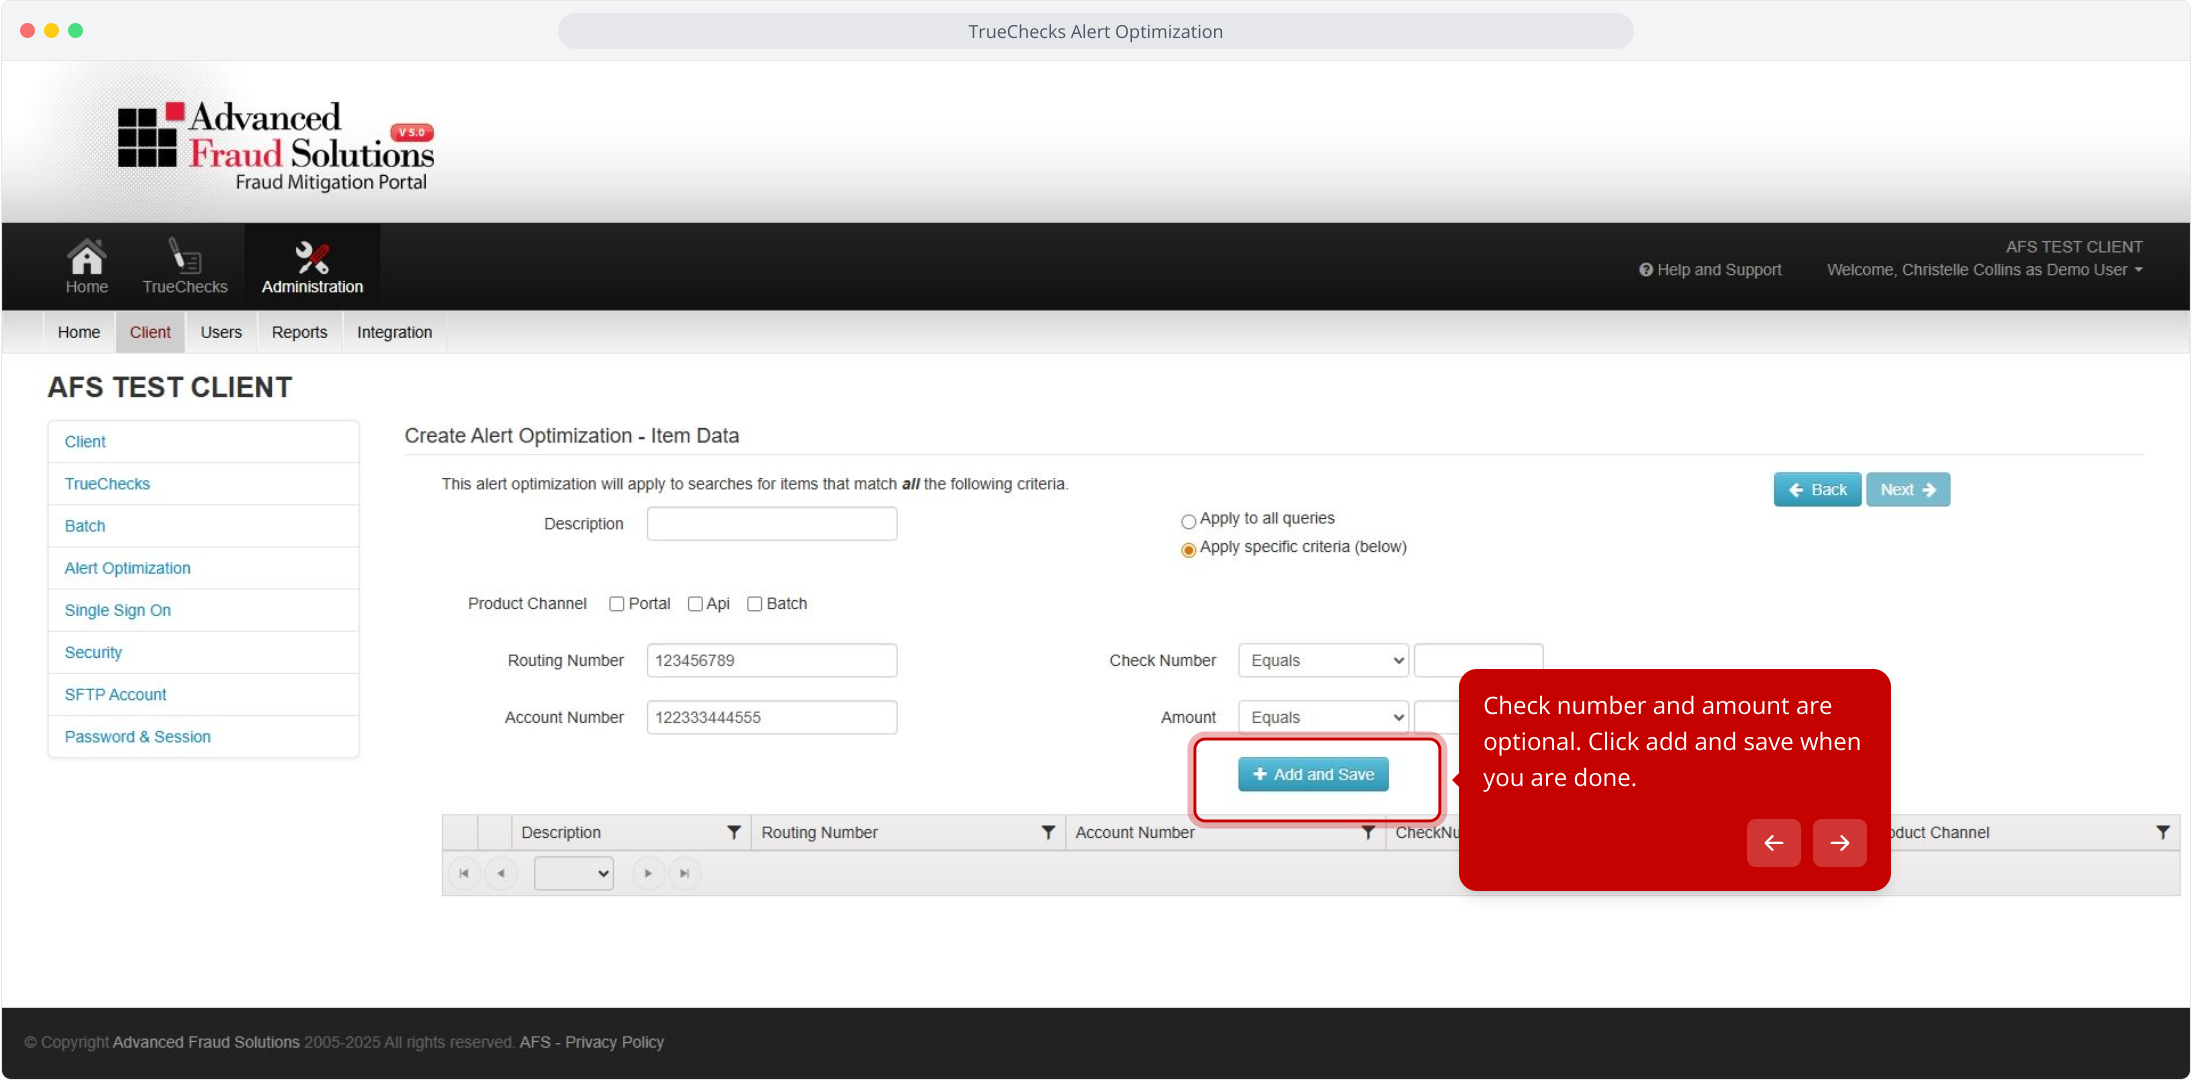
7. You have the option of optimizing all queries (Searches) or specific routing and/or account numbers.
You can also set thresholds between specific check numbers and even dollar amounts.
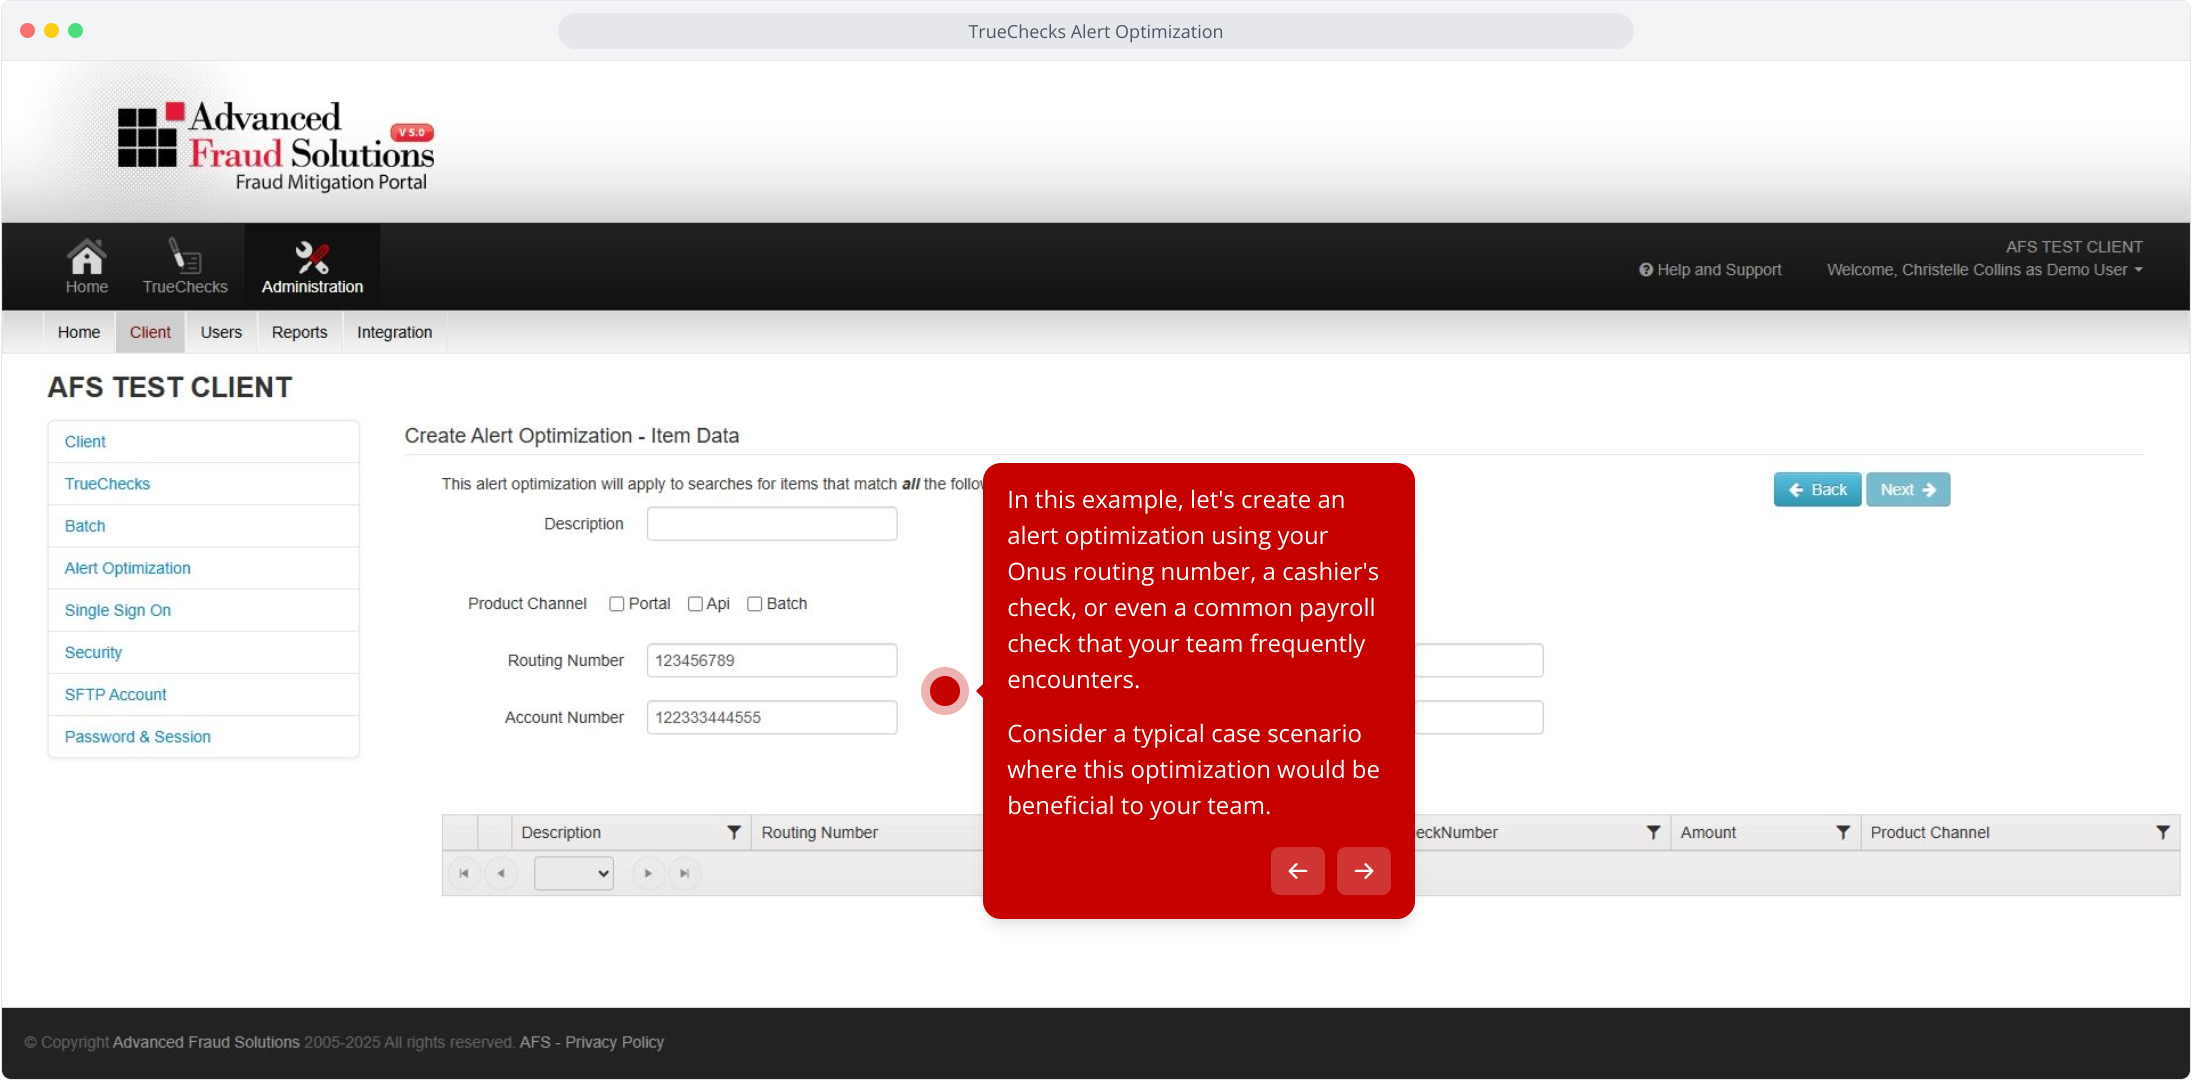
8. In this example, let's create an alert optimization using your Onus routing number, a cashier's check, or even a common payroll check that your team frequently encounters.
Consider a typical case scenario where this optimization would be beneficial to your team.
9. Check number and amount are optional. Click add and save when you are done.
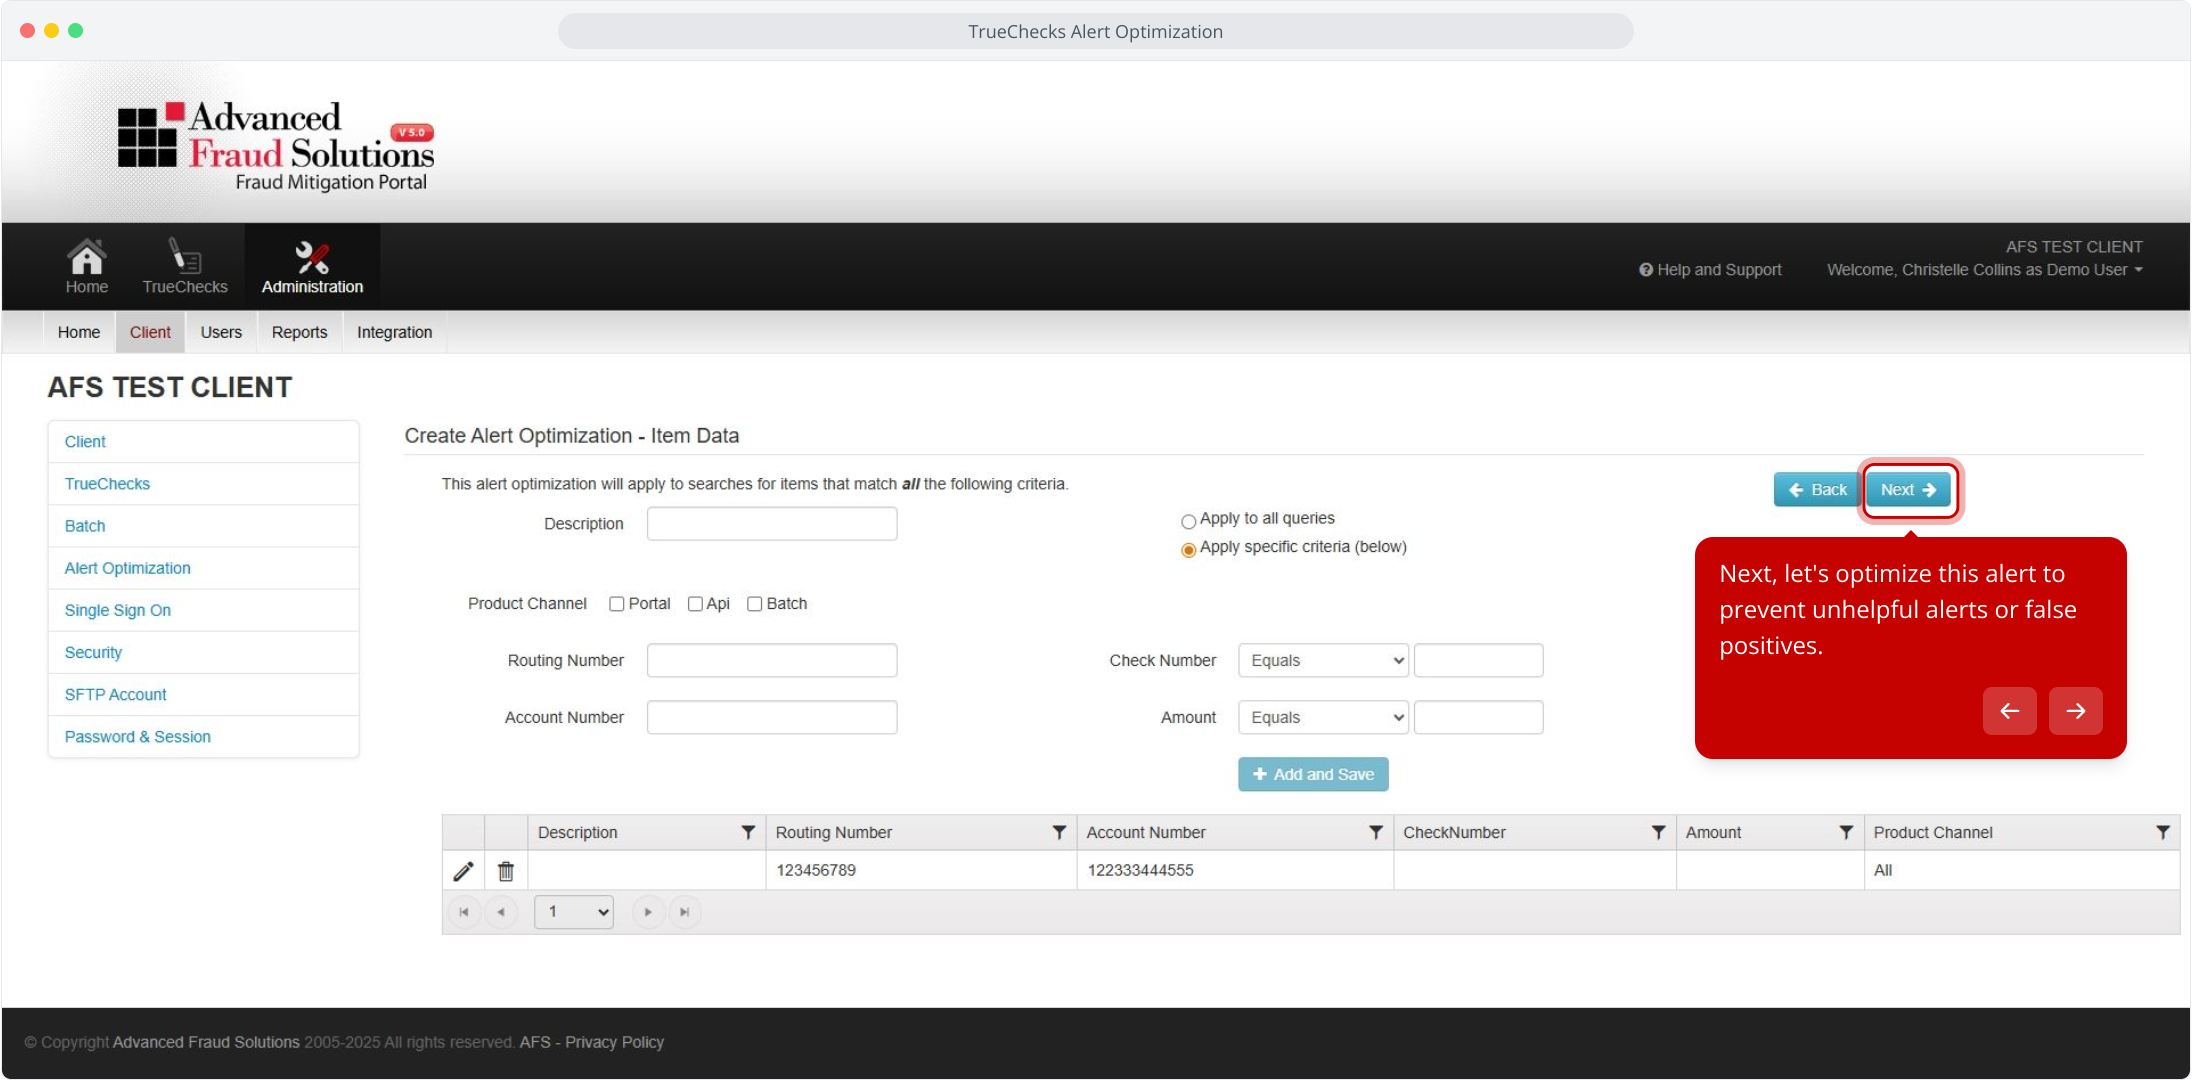
10. Next, let's optimize this alert to prevent unhelpful alerts or false positives.
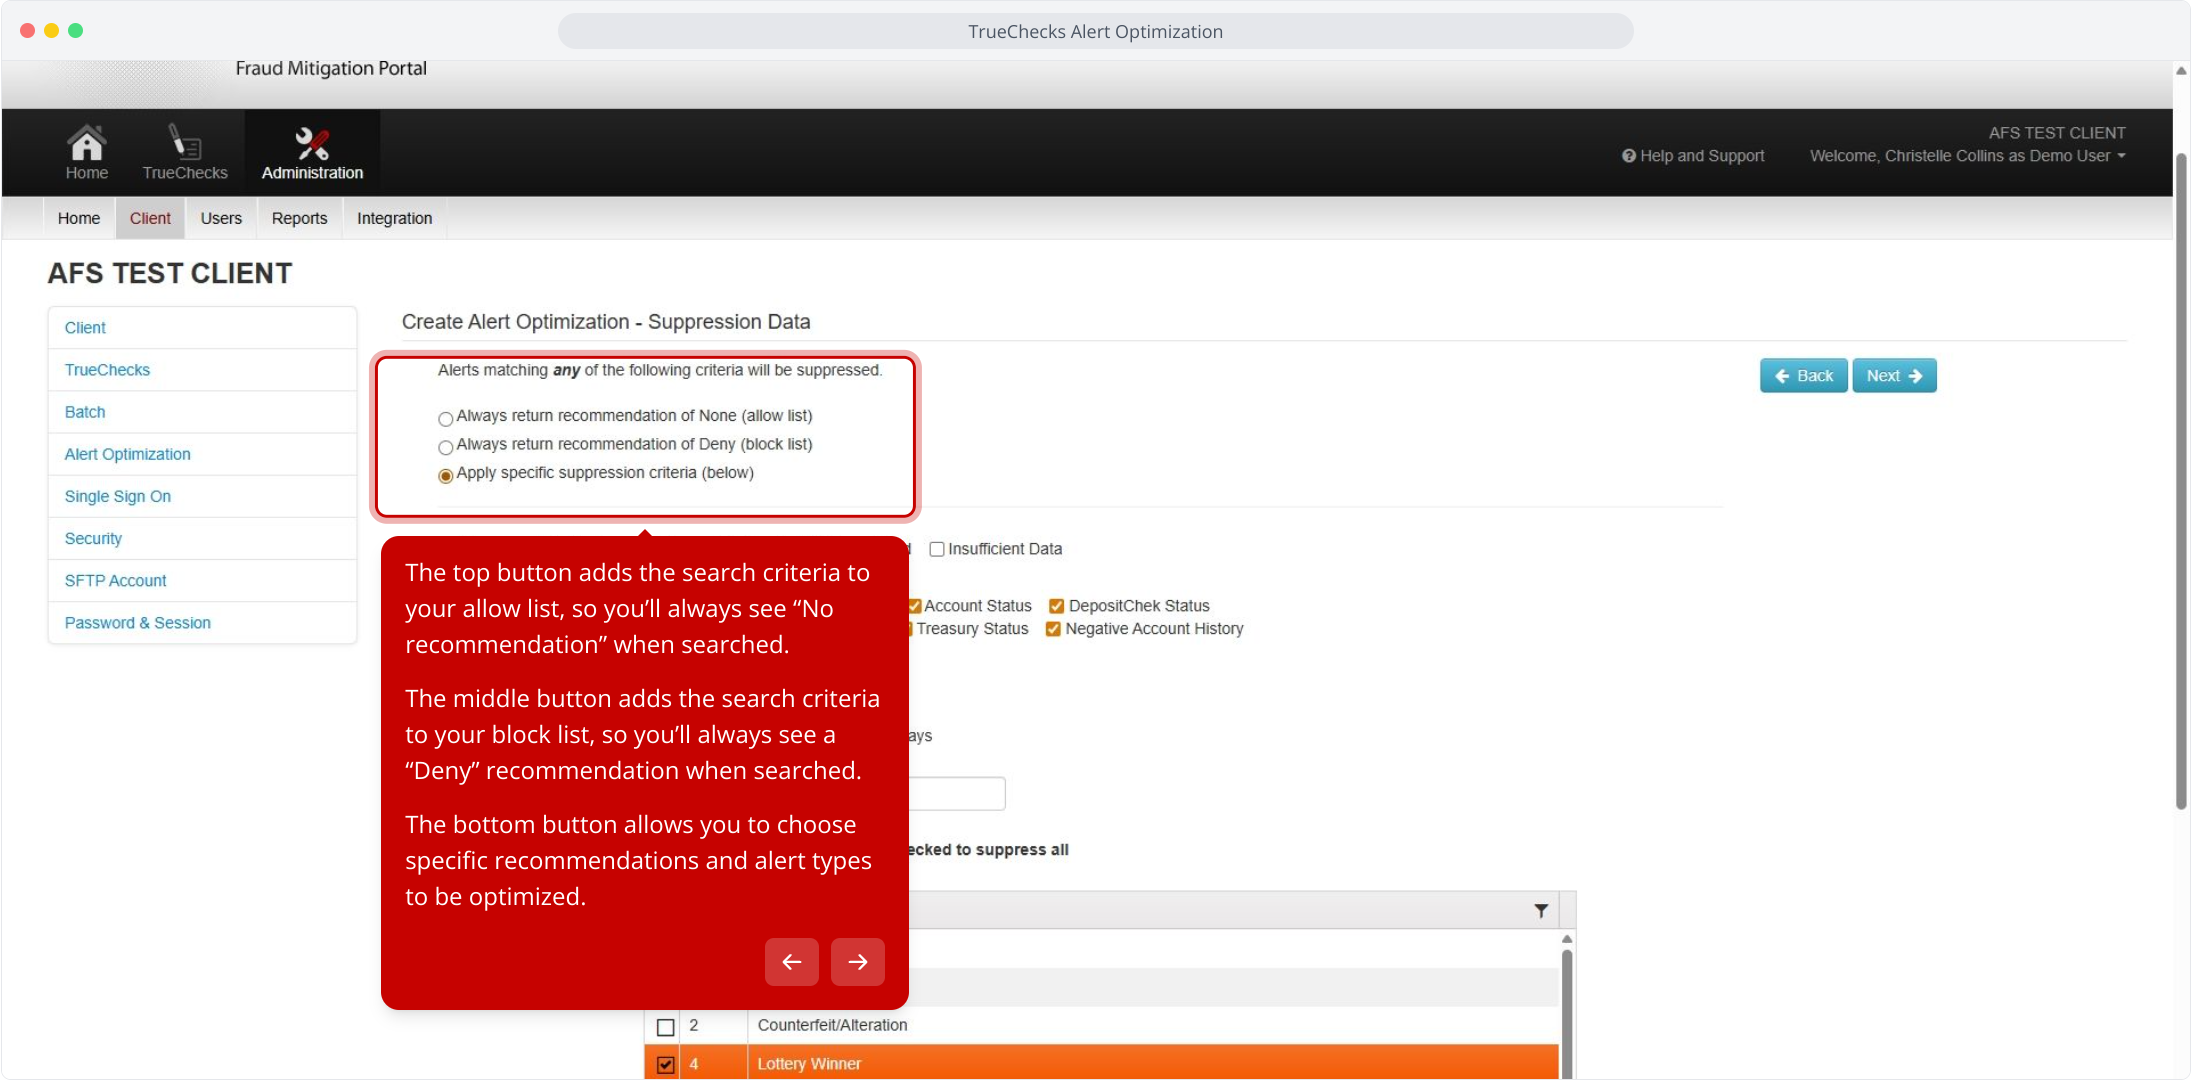
11. The top button adds the search criteria to your allow list, so you’ll always see “No recommendation” when searched.
The middle button adds the search criteria to your block list, so you’ll always see a “Deny” recommendation when searched.
The bottom button allows you to choose specific recommendations and alert types to be optimized.
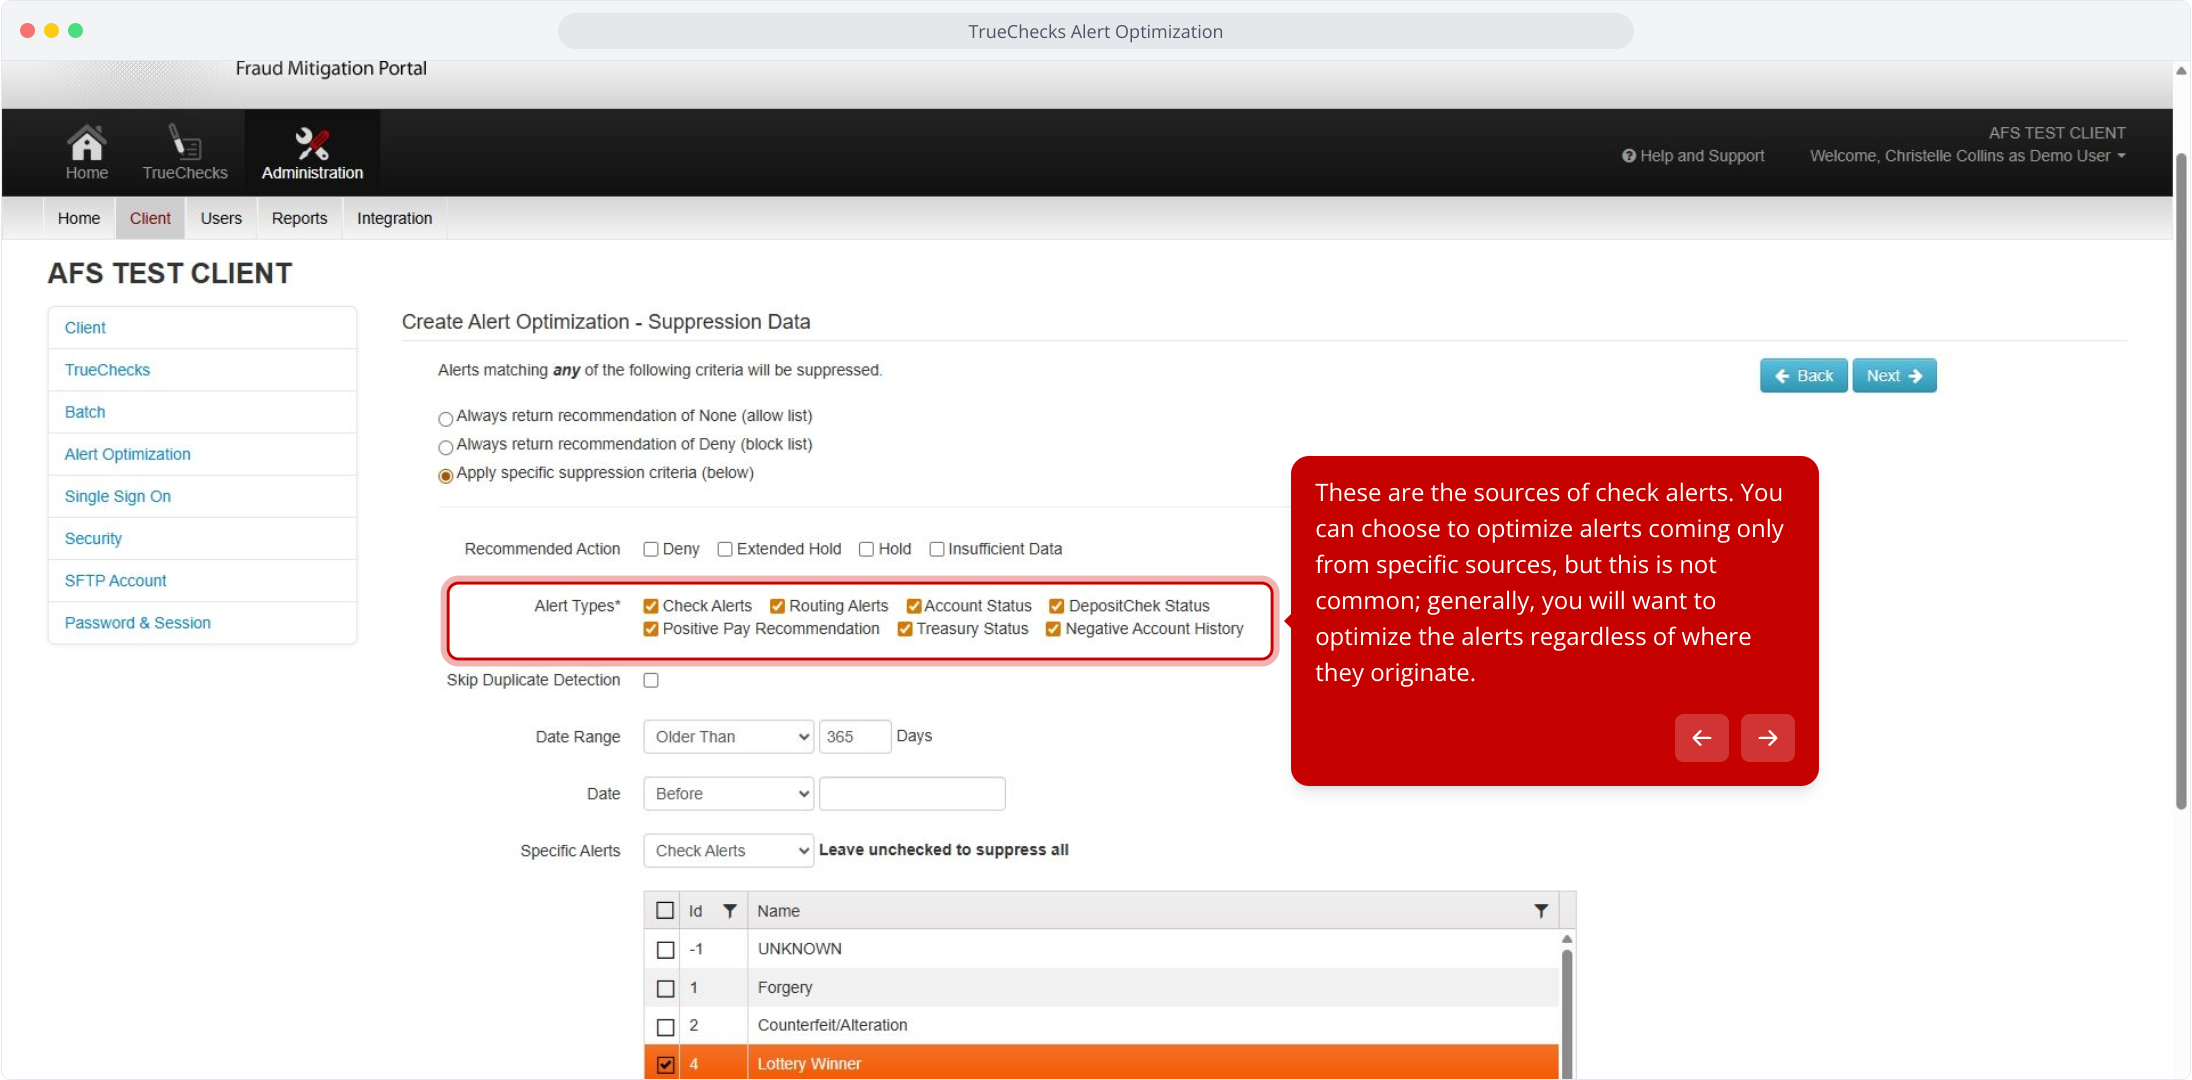
12. These are the sources of check alerts. You can choose to optimize alerts coming only from specific sources, but this is not common; generally, you will want to optimize the alerts regardless of where they originate.
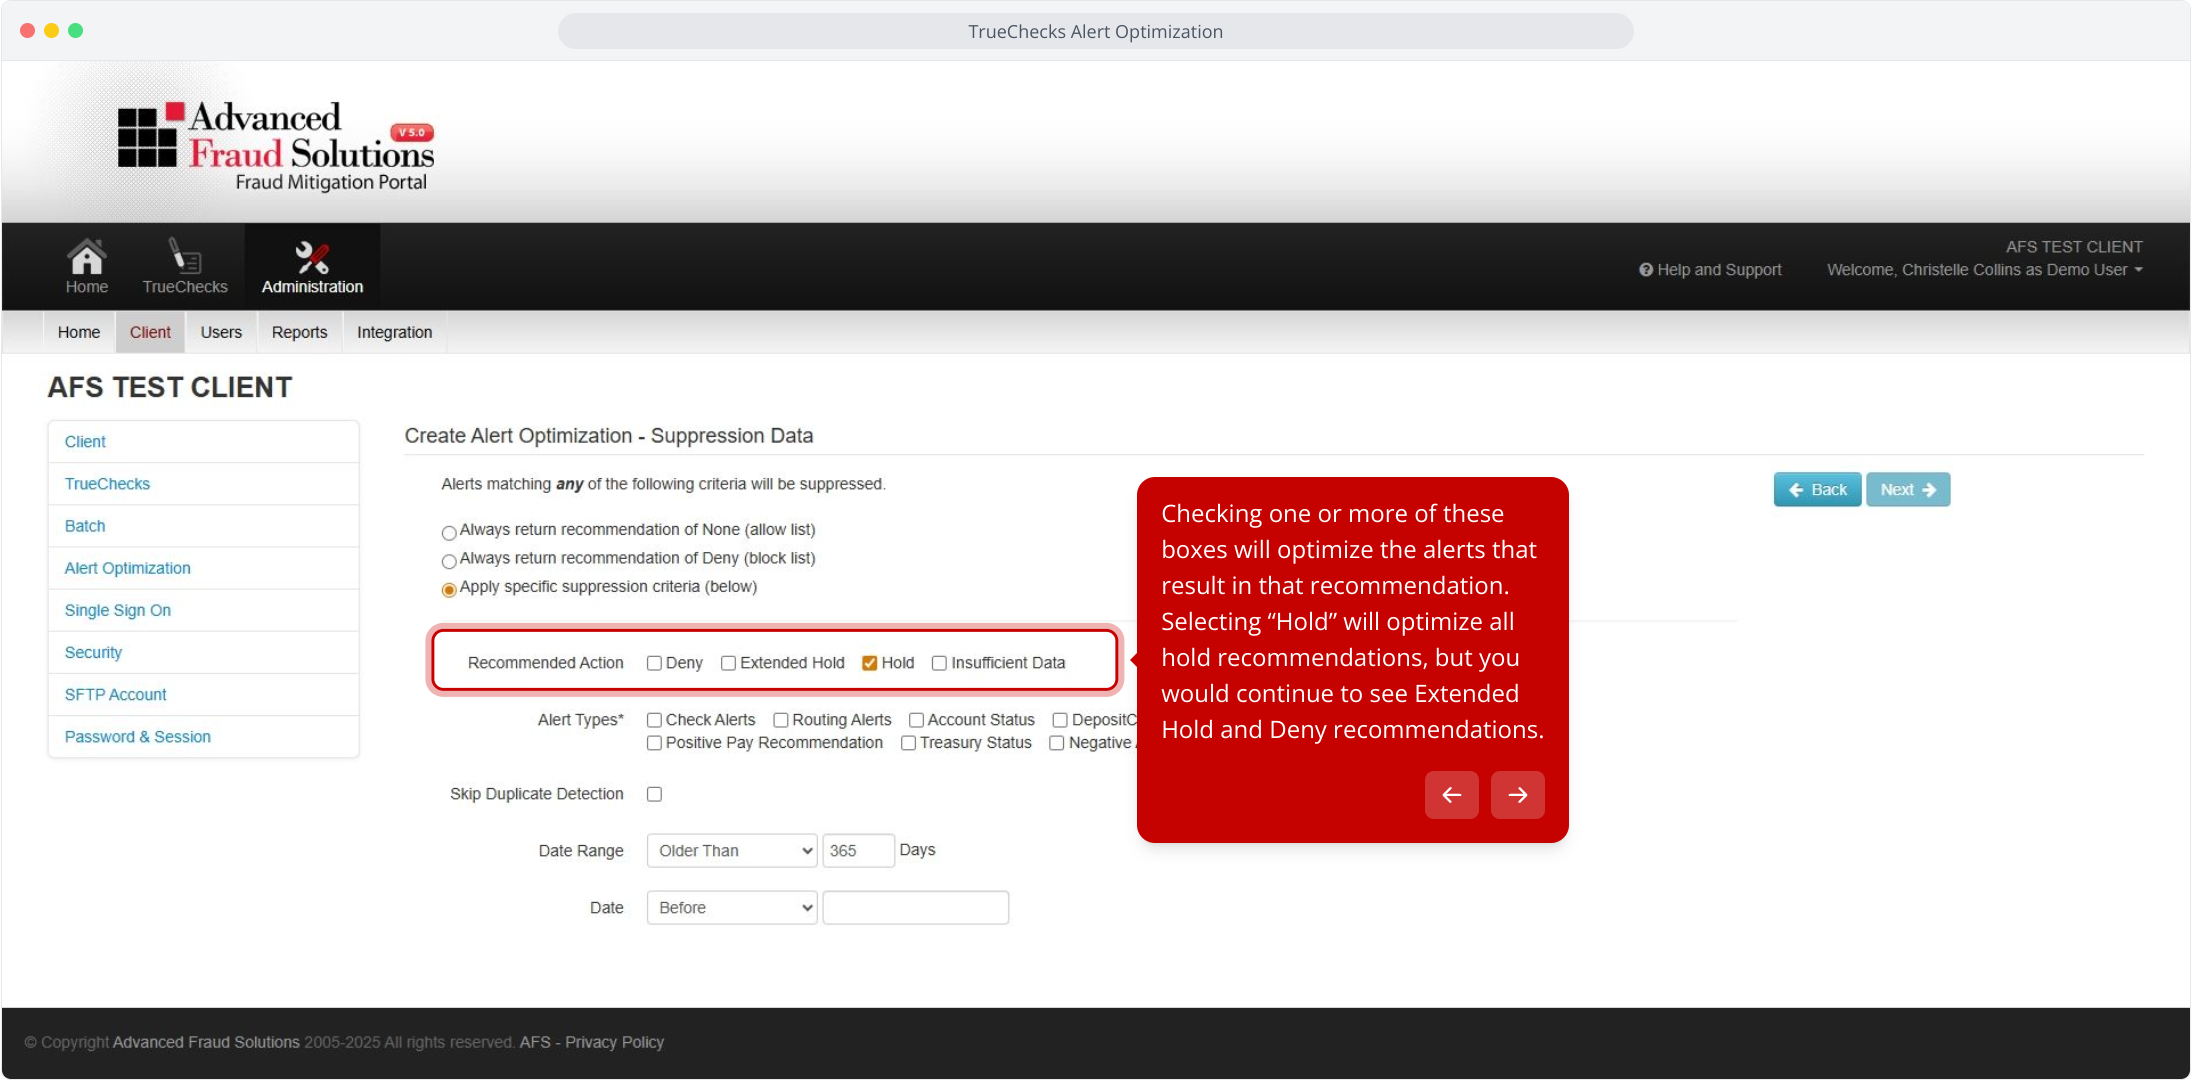
13. Checking one or more of these boxes will optimize the alerts that result in that recommendation. Selecting “Hold” will optimize all hold recommendations, but you would continue to see Extended Hold and Deny recommendations.
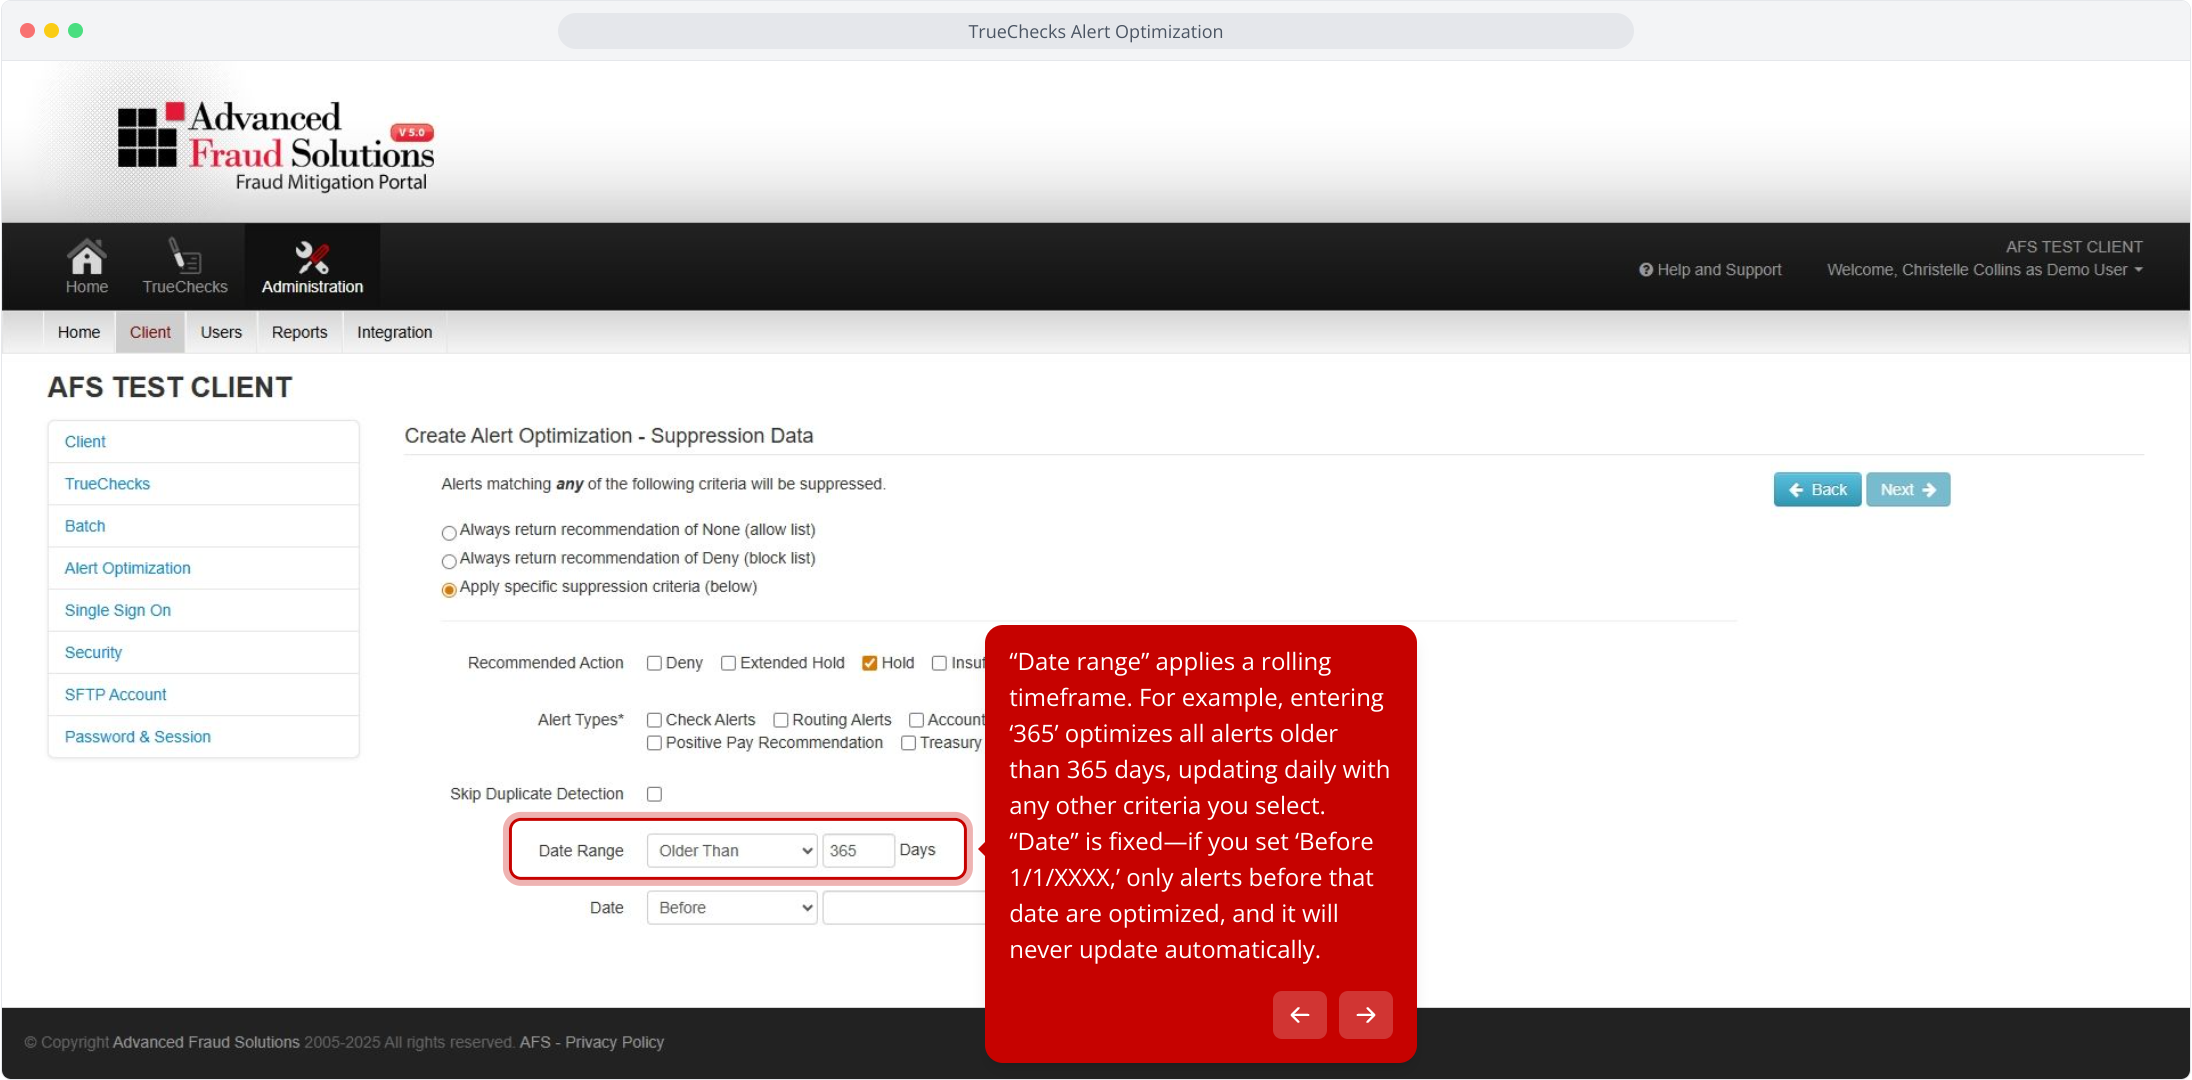
14. “Date range” applies a rolling timeframe. For example, entering ‘365’ optimizes all alerts older than 365 days, updating daily with any other criteria you select. “Date” is fixed—if you set ‘Before 1/1/XXXX,’ only alerts before that date are optimized, and it will never update automatically.
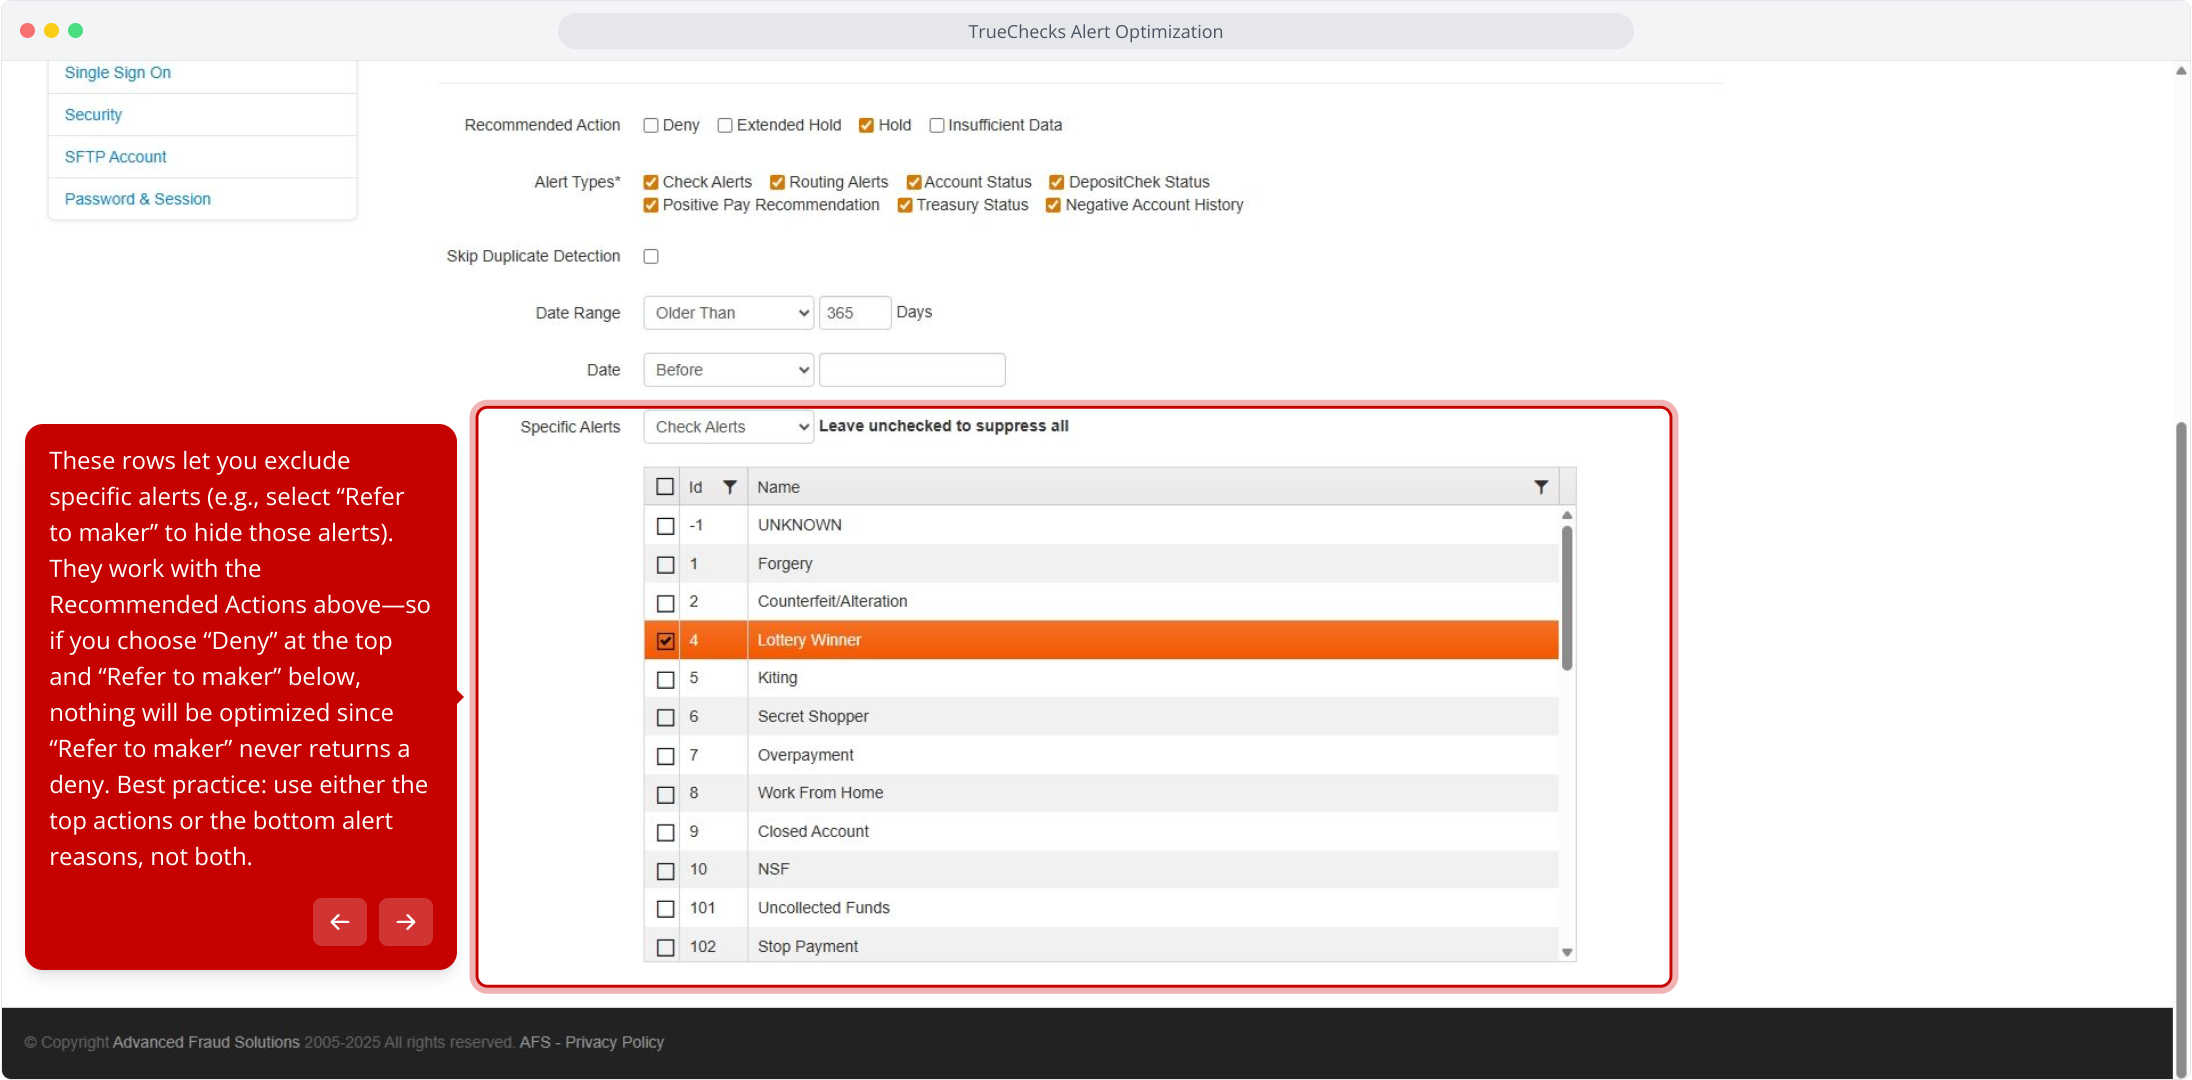
15. These rows let you exclude specific alerts (e.g., select “Refer to maker” to hide those alerts). They work with the Recommended Actions above—so if you choose “Deny” at the top and “Refer to maker” below, nothing will be optimized since “Refer to maker” never returns a deny. Best practice: use either the top actions or the bottom alert reasons, not both.
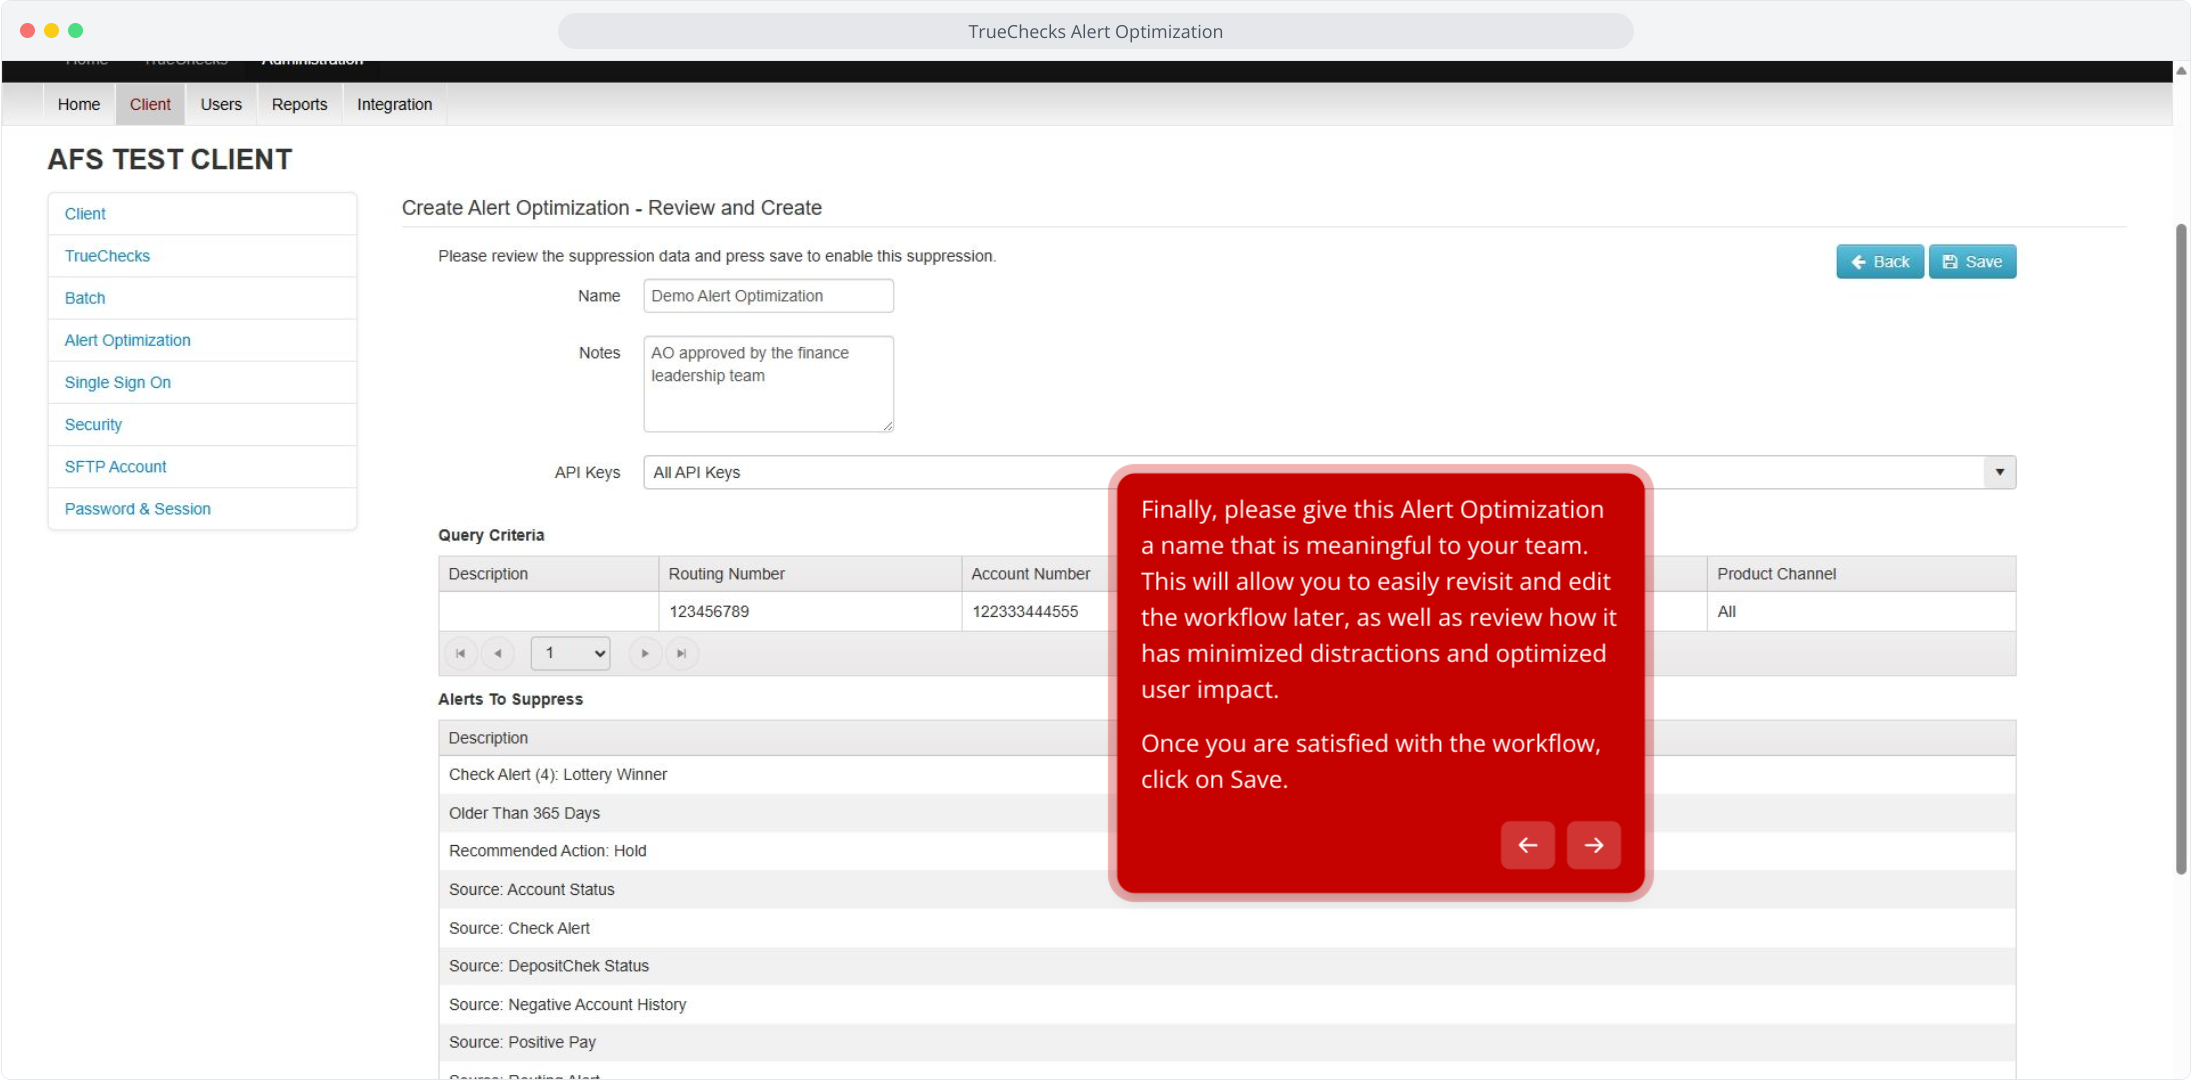
16. Finally, please give this Alert Optimization a name that is meaningful to your team. This will allow you to easily revisit and edit the workflow later, as well as review how it has minimized distractions and optimized user impact.
Once you are satisfied with the workflow, click on Save.
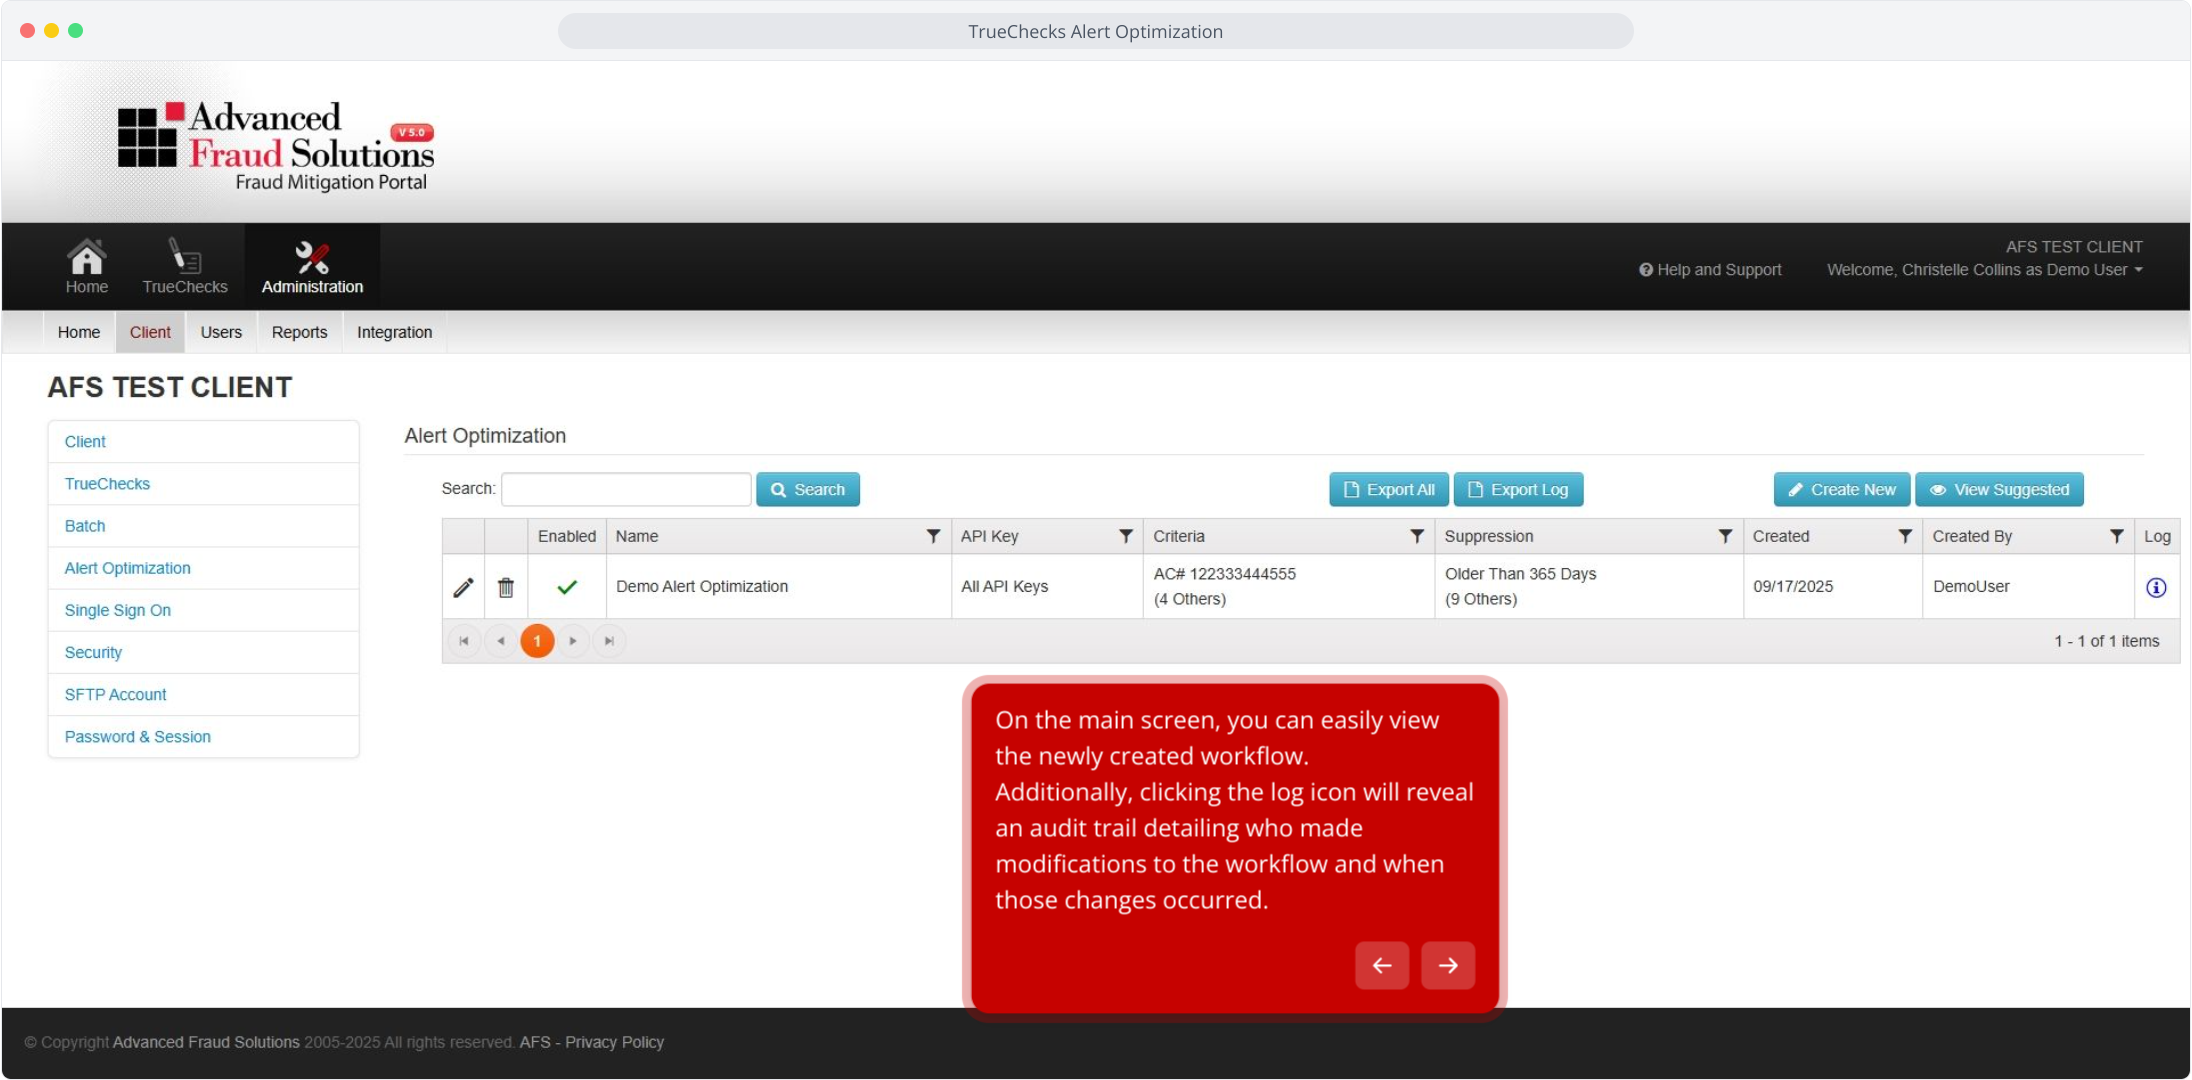
17. On the main screen, you can easily view the newly created workflow.
Additionally, clicking the log icon will reveal an audit trail detailing who made modifications to the workflow and when those changes occurred.
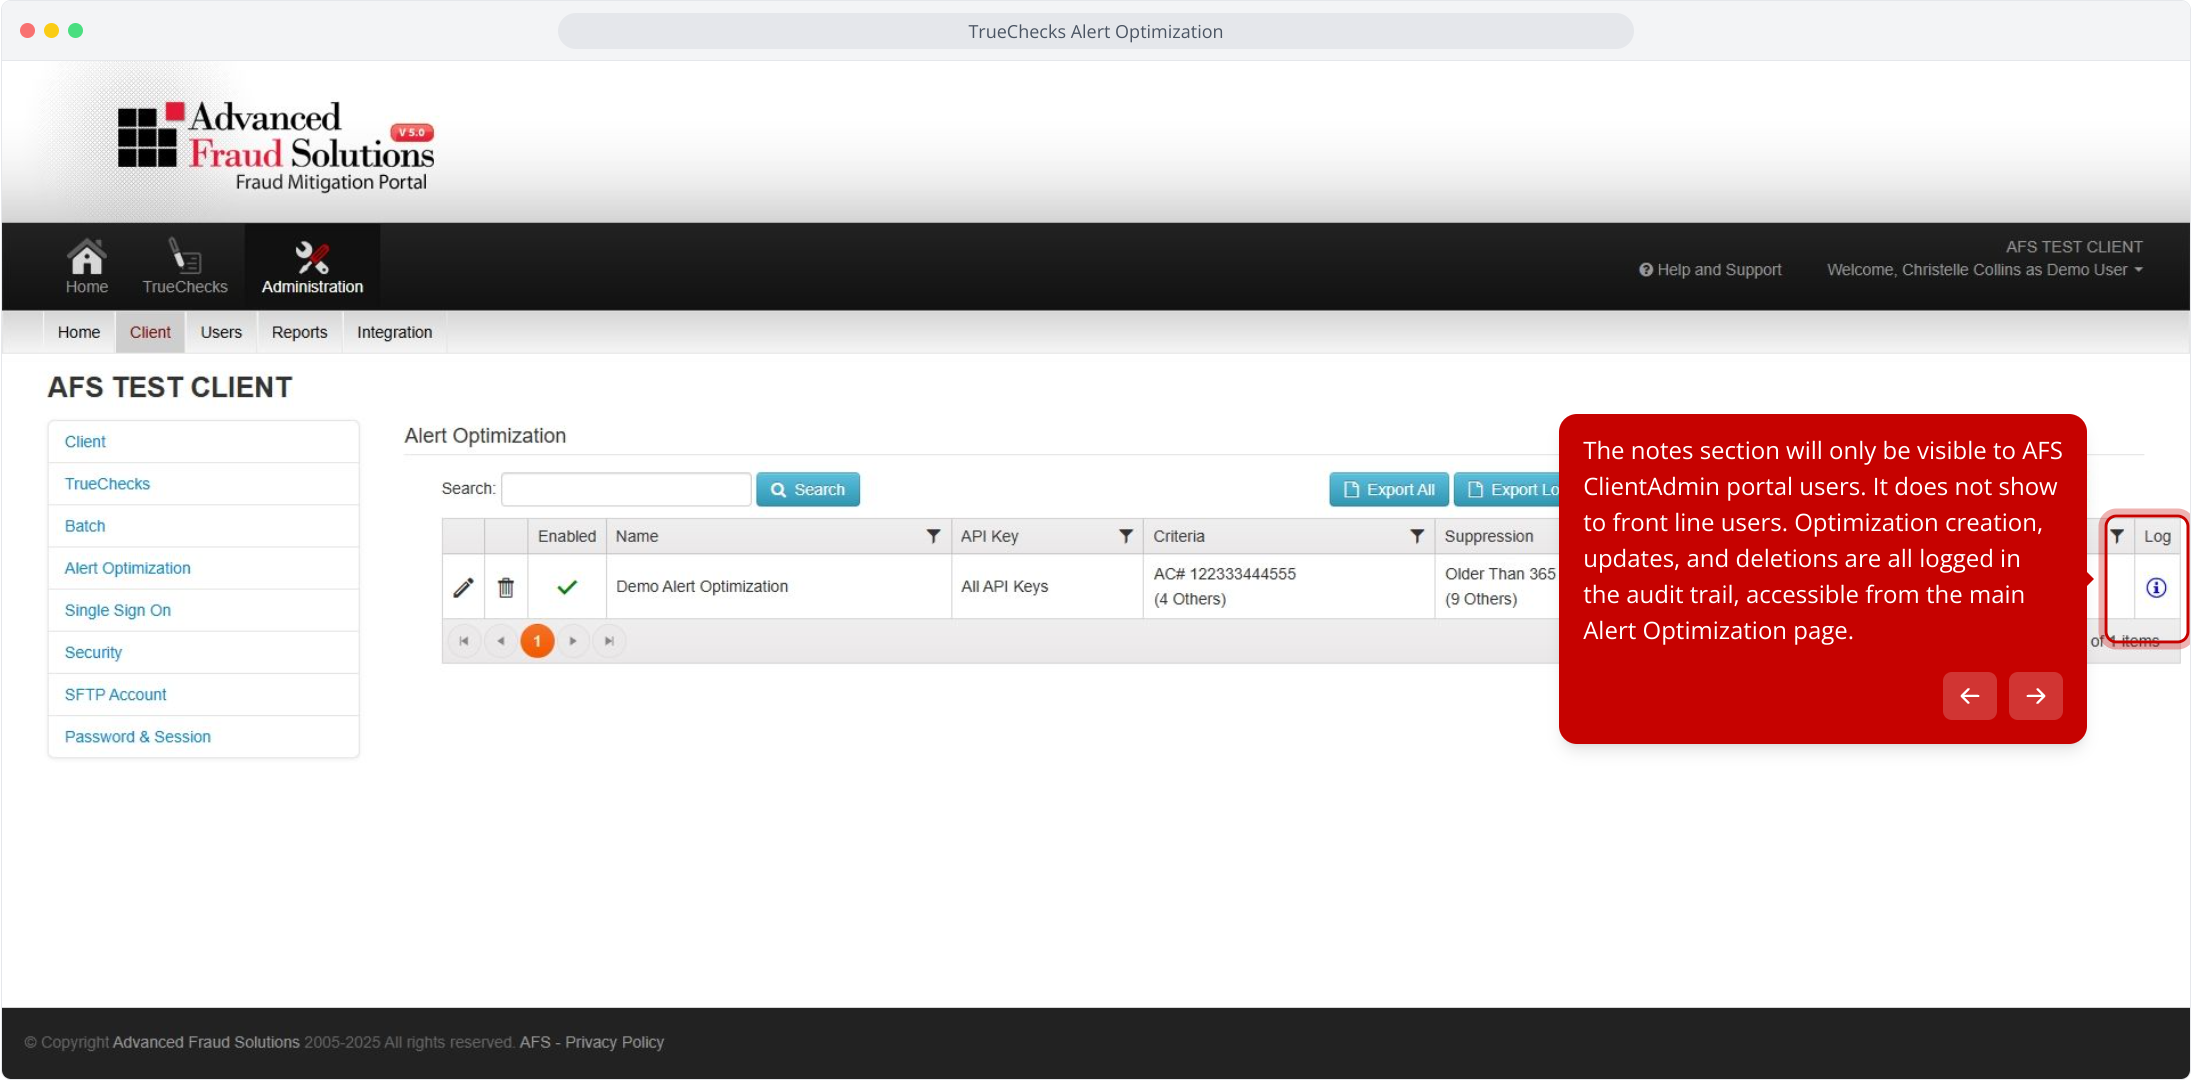
18. The notes section will only be visible to AFS ClientAdmin portal users. It does not show to front line users. Optimization creation, updates, and deletions are all logged in the audit trail, accessible from the main Alert Optimization page.
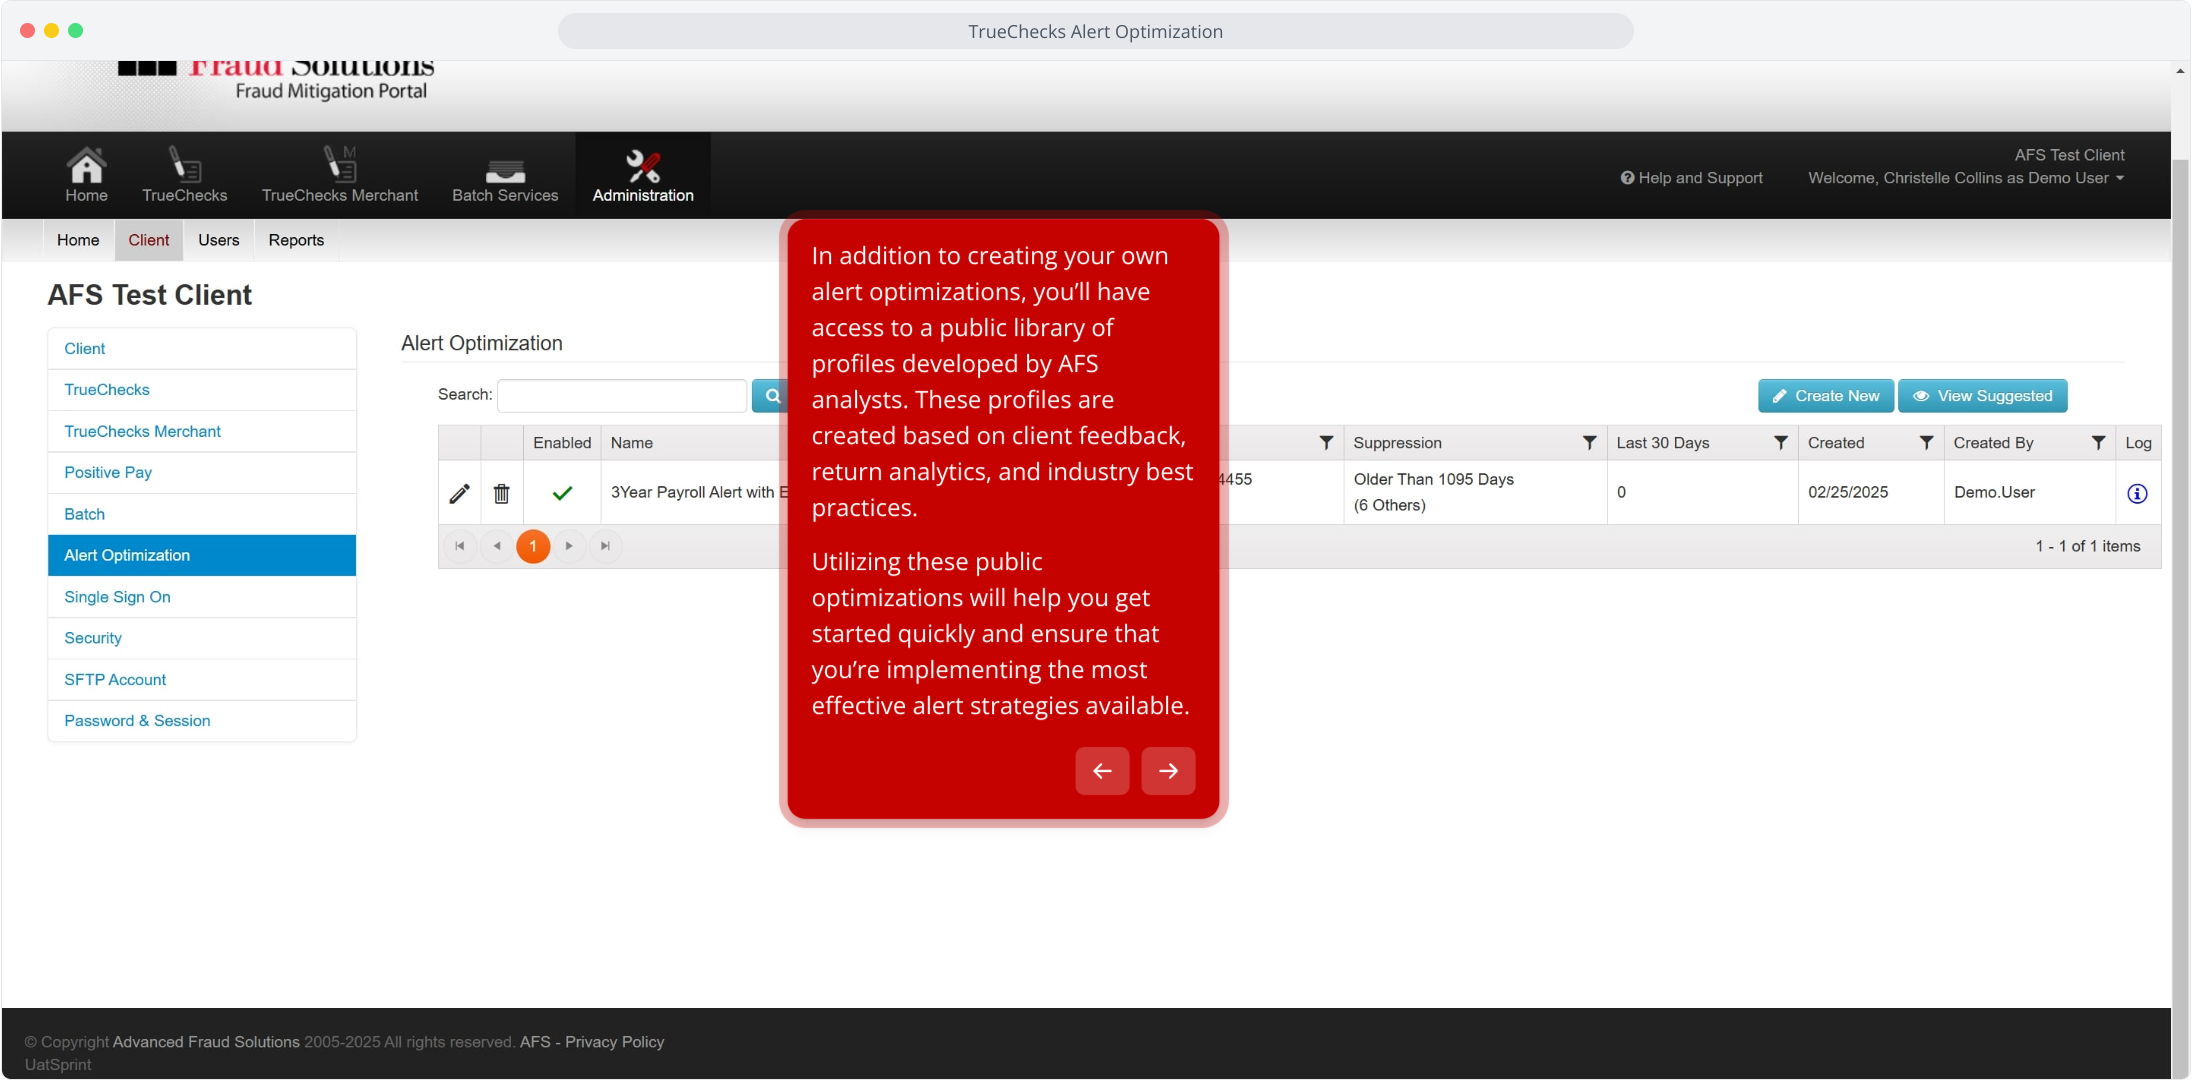
19. In addition to creating your own alert optimizations, you’ll have access to a public library of profiles developed by AFS analysts. These profiles are created based on client feedback, return analytics, and industry best practices.
Utilizing these public optimizations will help you get started quickly and ensure that you’re implementing the most effective alert strategies available.
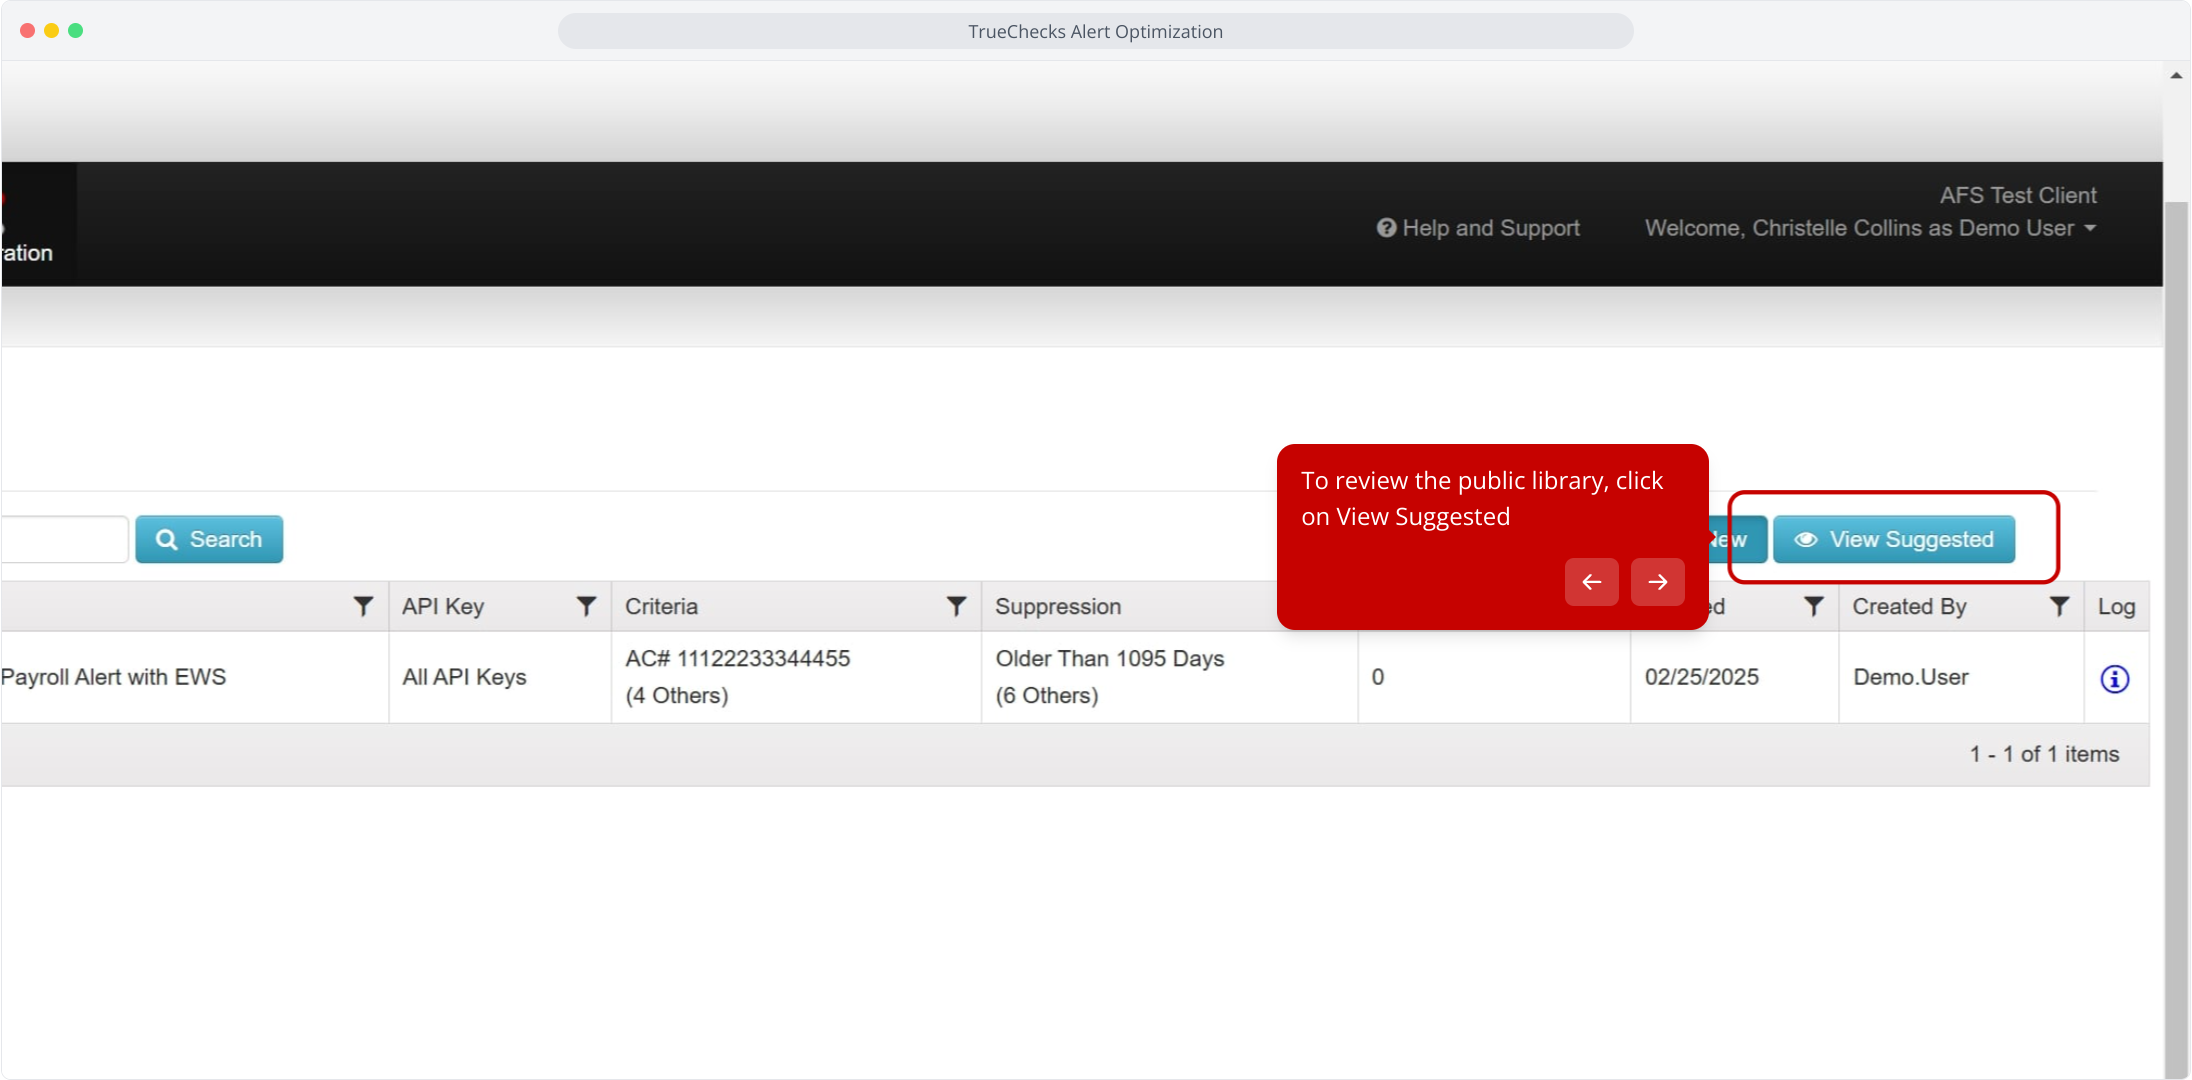
20. To review the public library, click on View Suggested
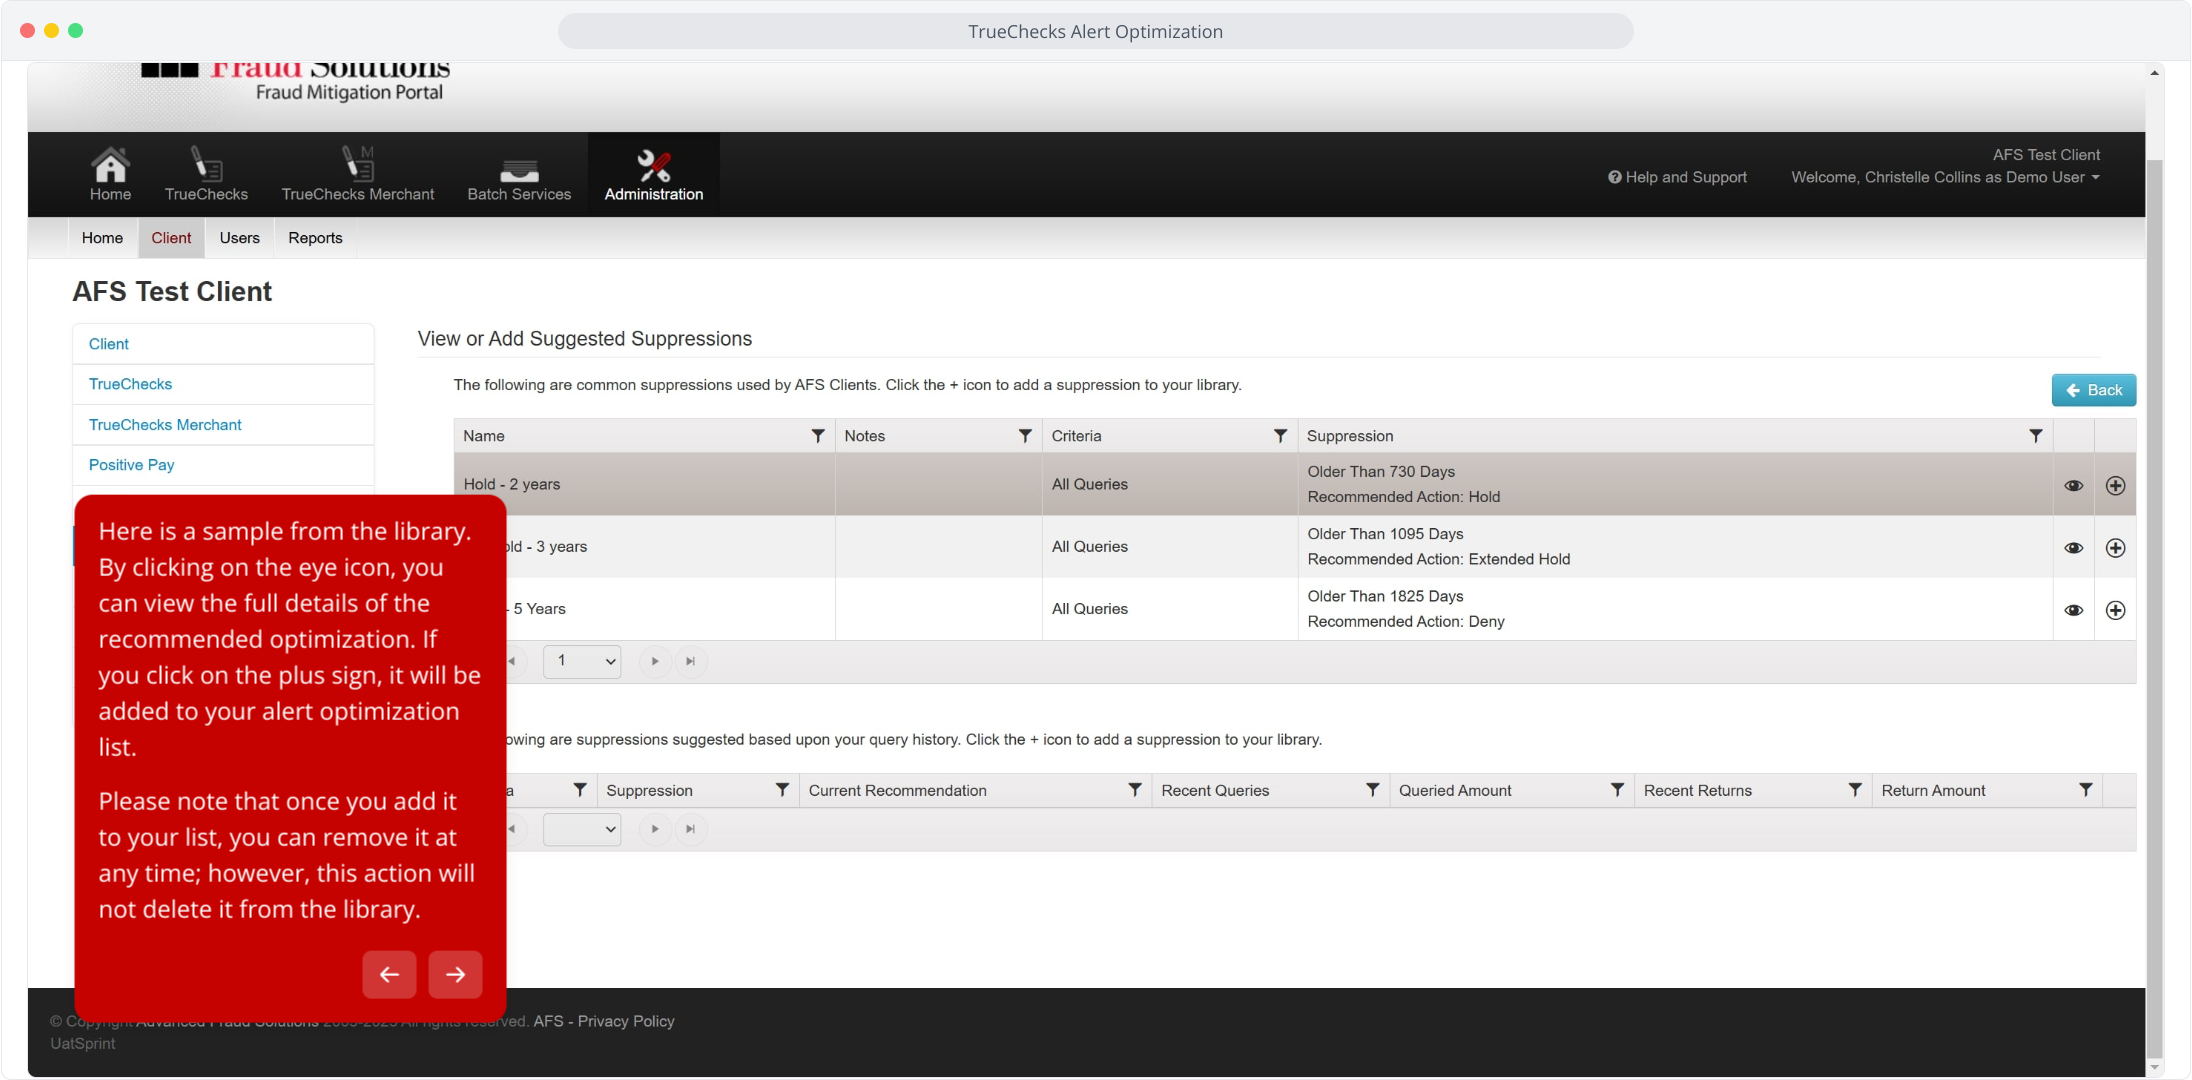
21. Here is a sample from the library. By clicking on the eye icon, you can view the full details of the recommended optimization. If you click on the plus sign, it will be added to your alert optimization list.
Please note that once you add it to your list, you can remove it at any time; however, this action will not delete it from the library.
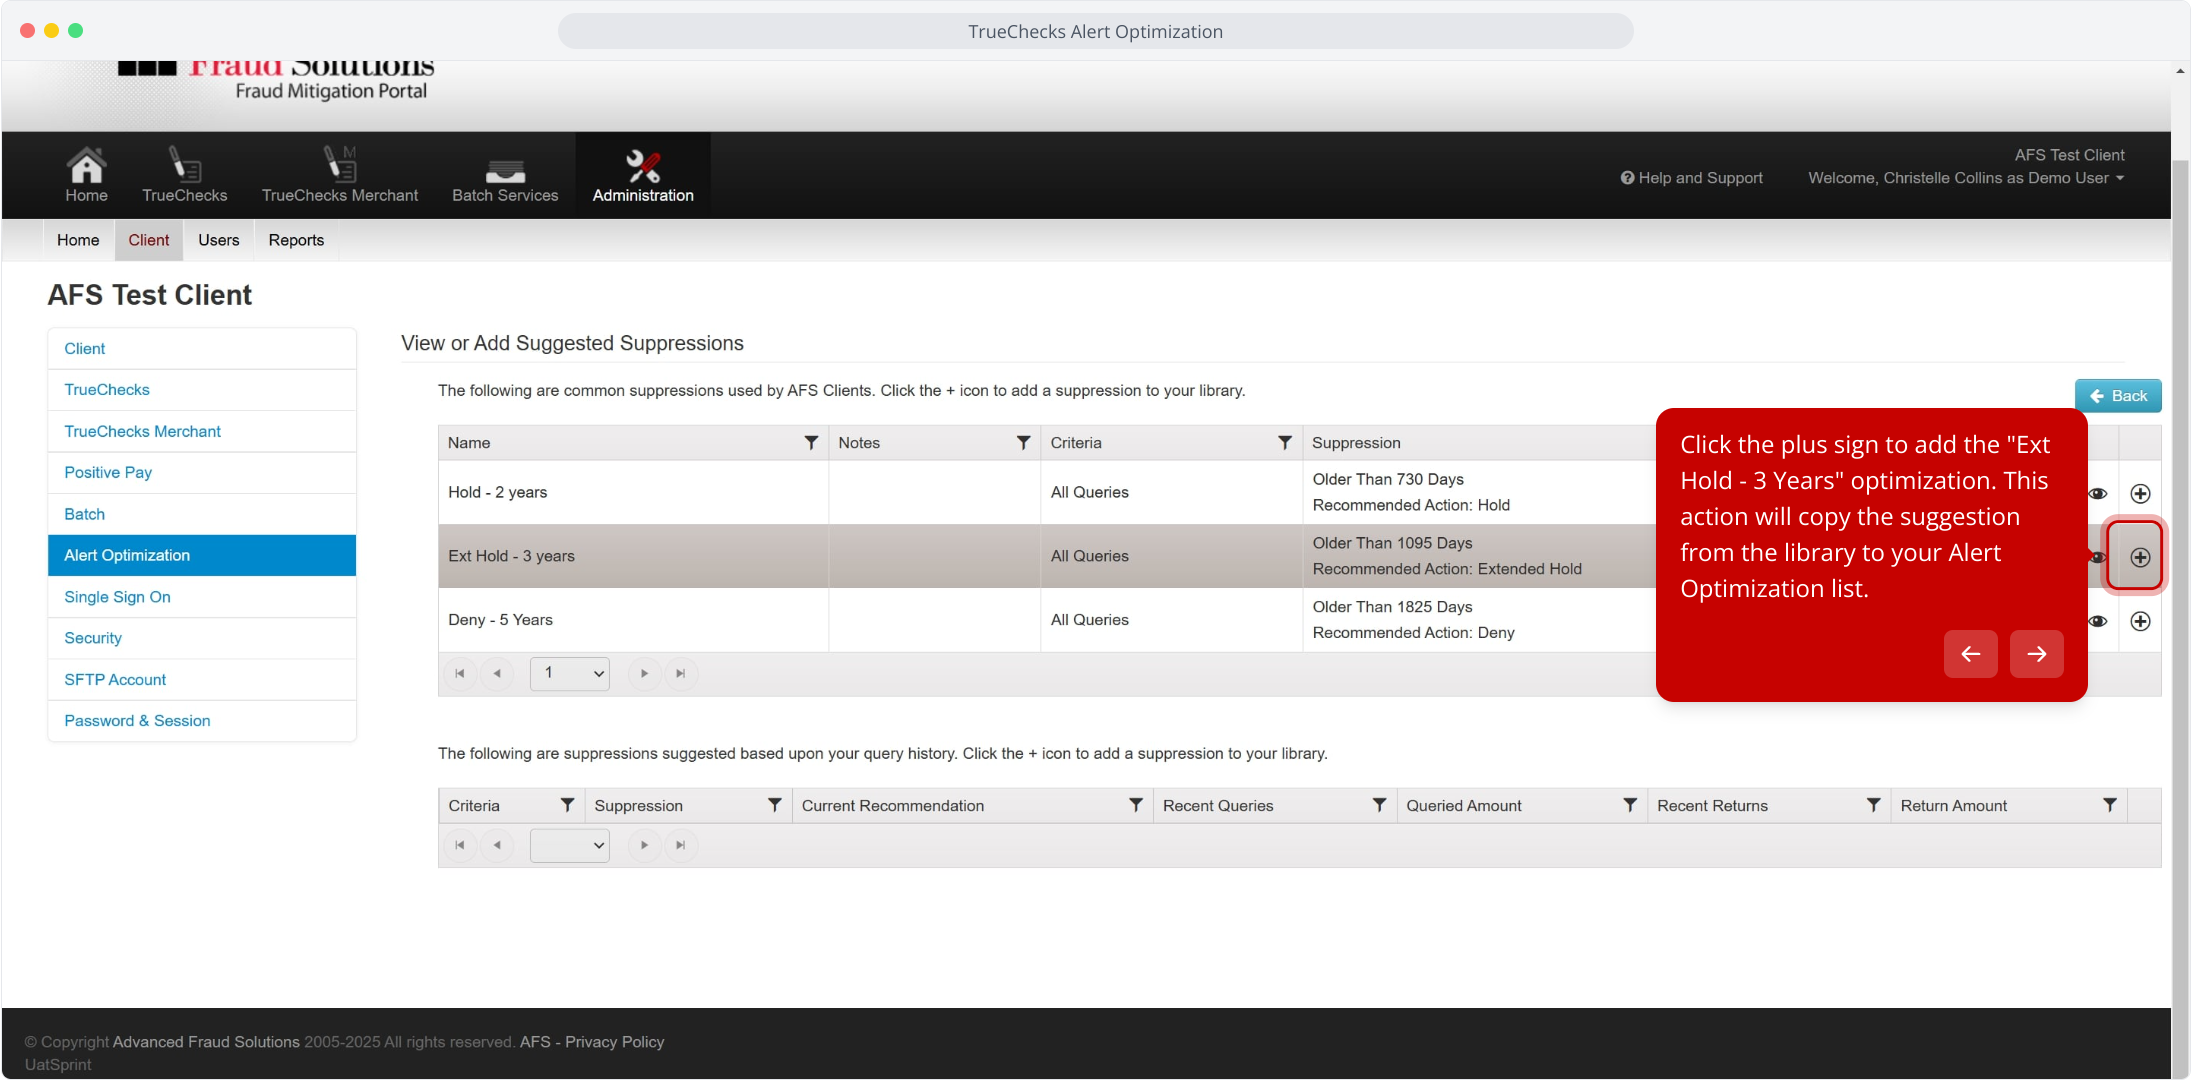
22. Click the plus sign to add the "Ext Hold - 3 Years" optimization. This action will copy the suggestion from the library to your Alert Optimization list.
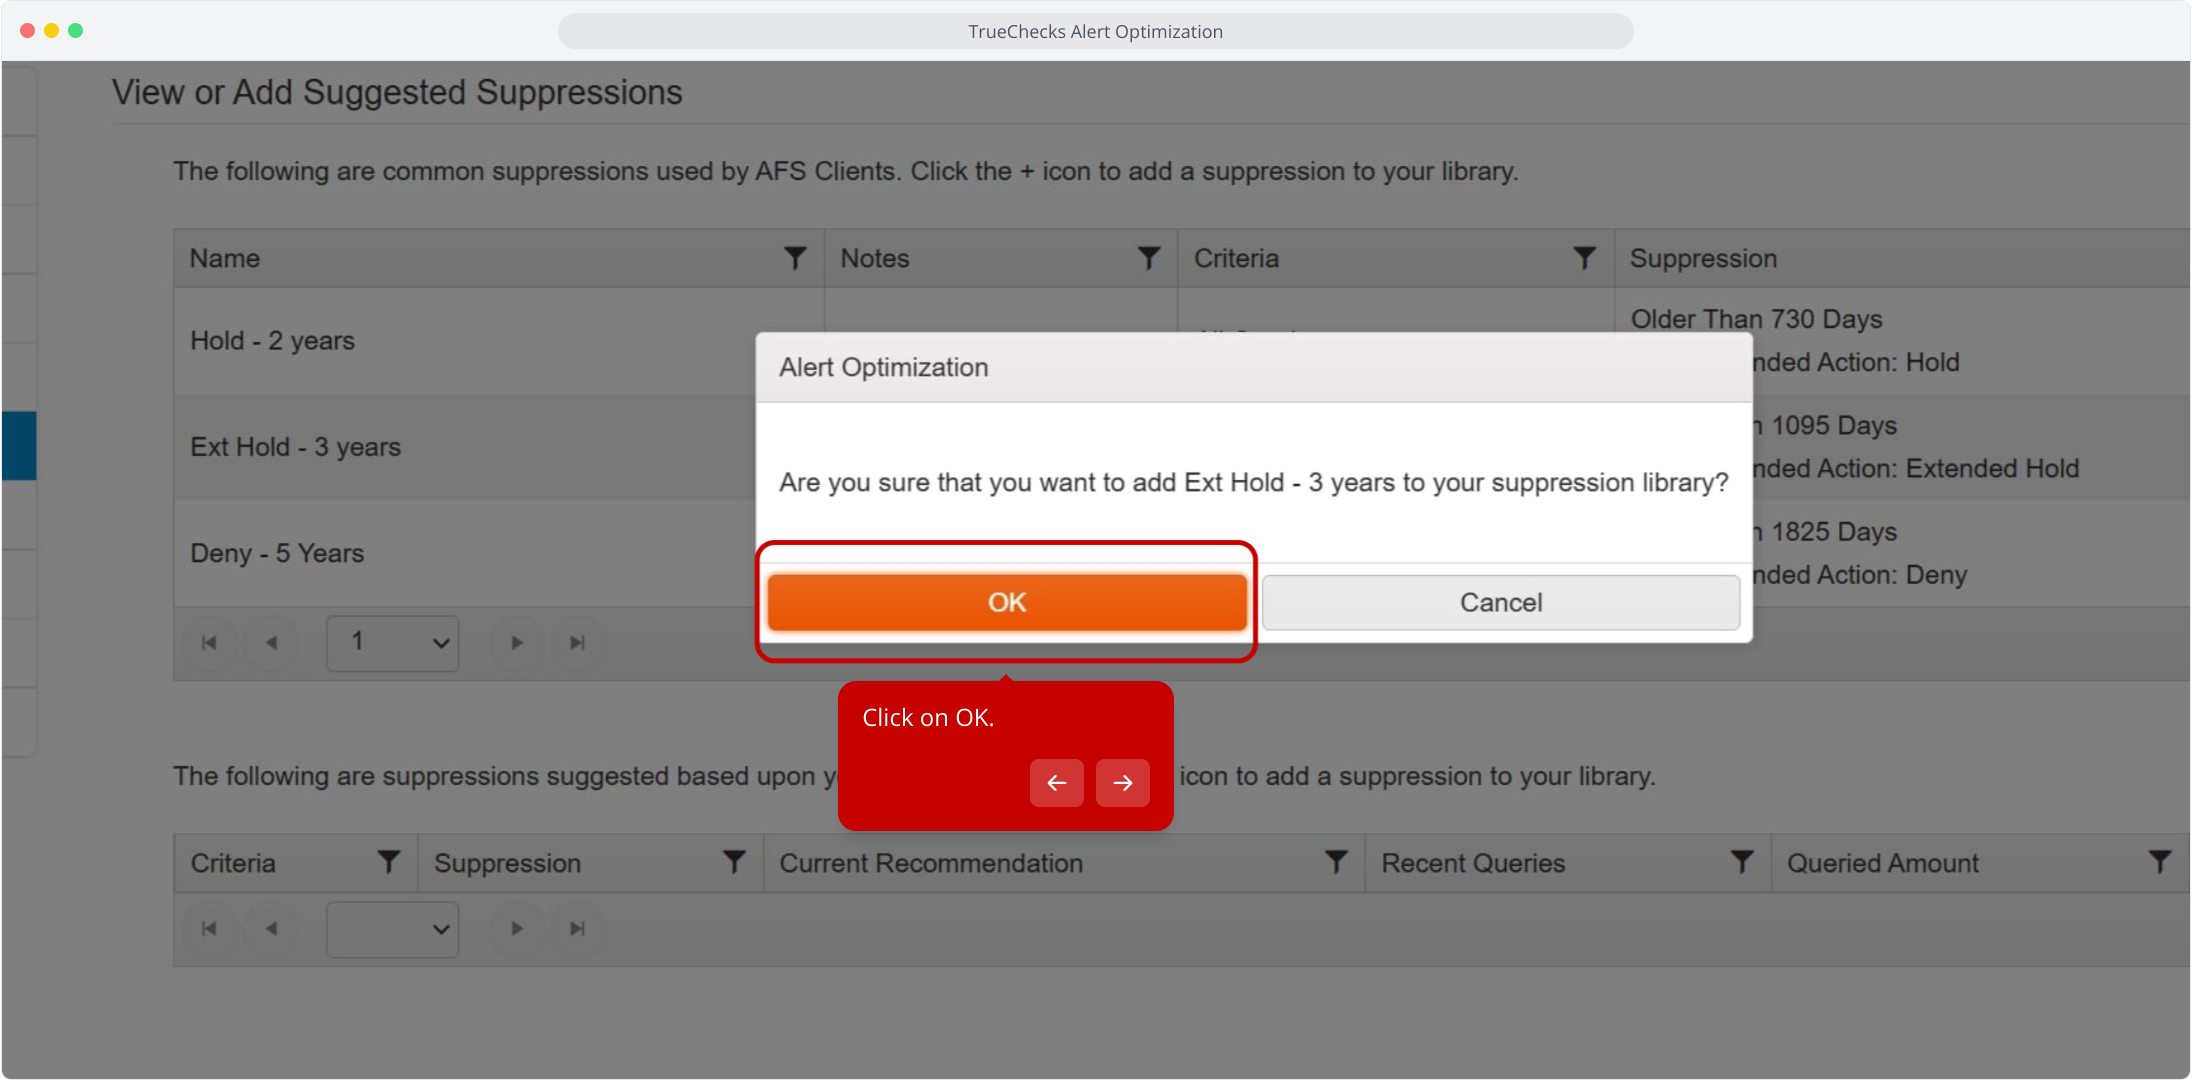
23. Click on OK.
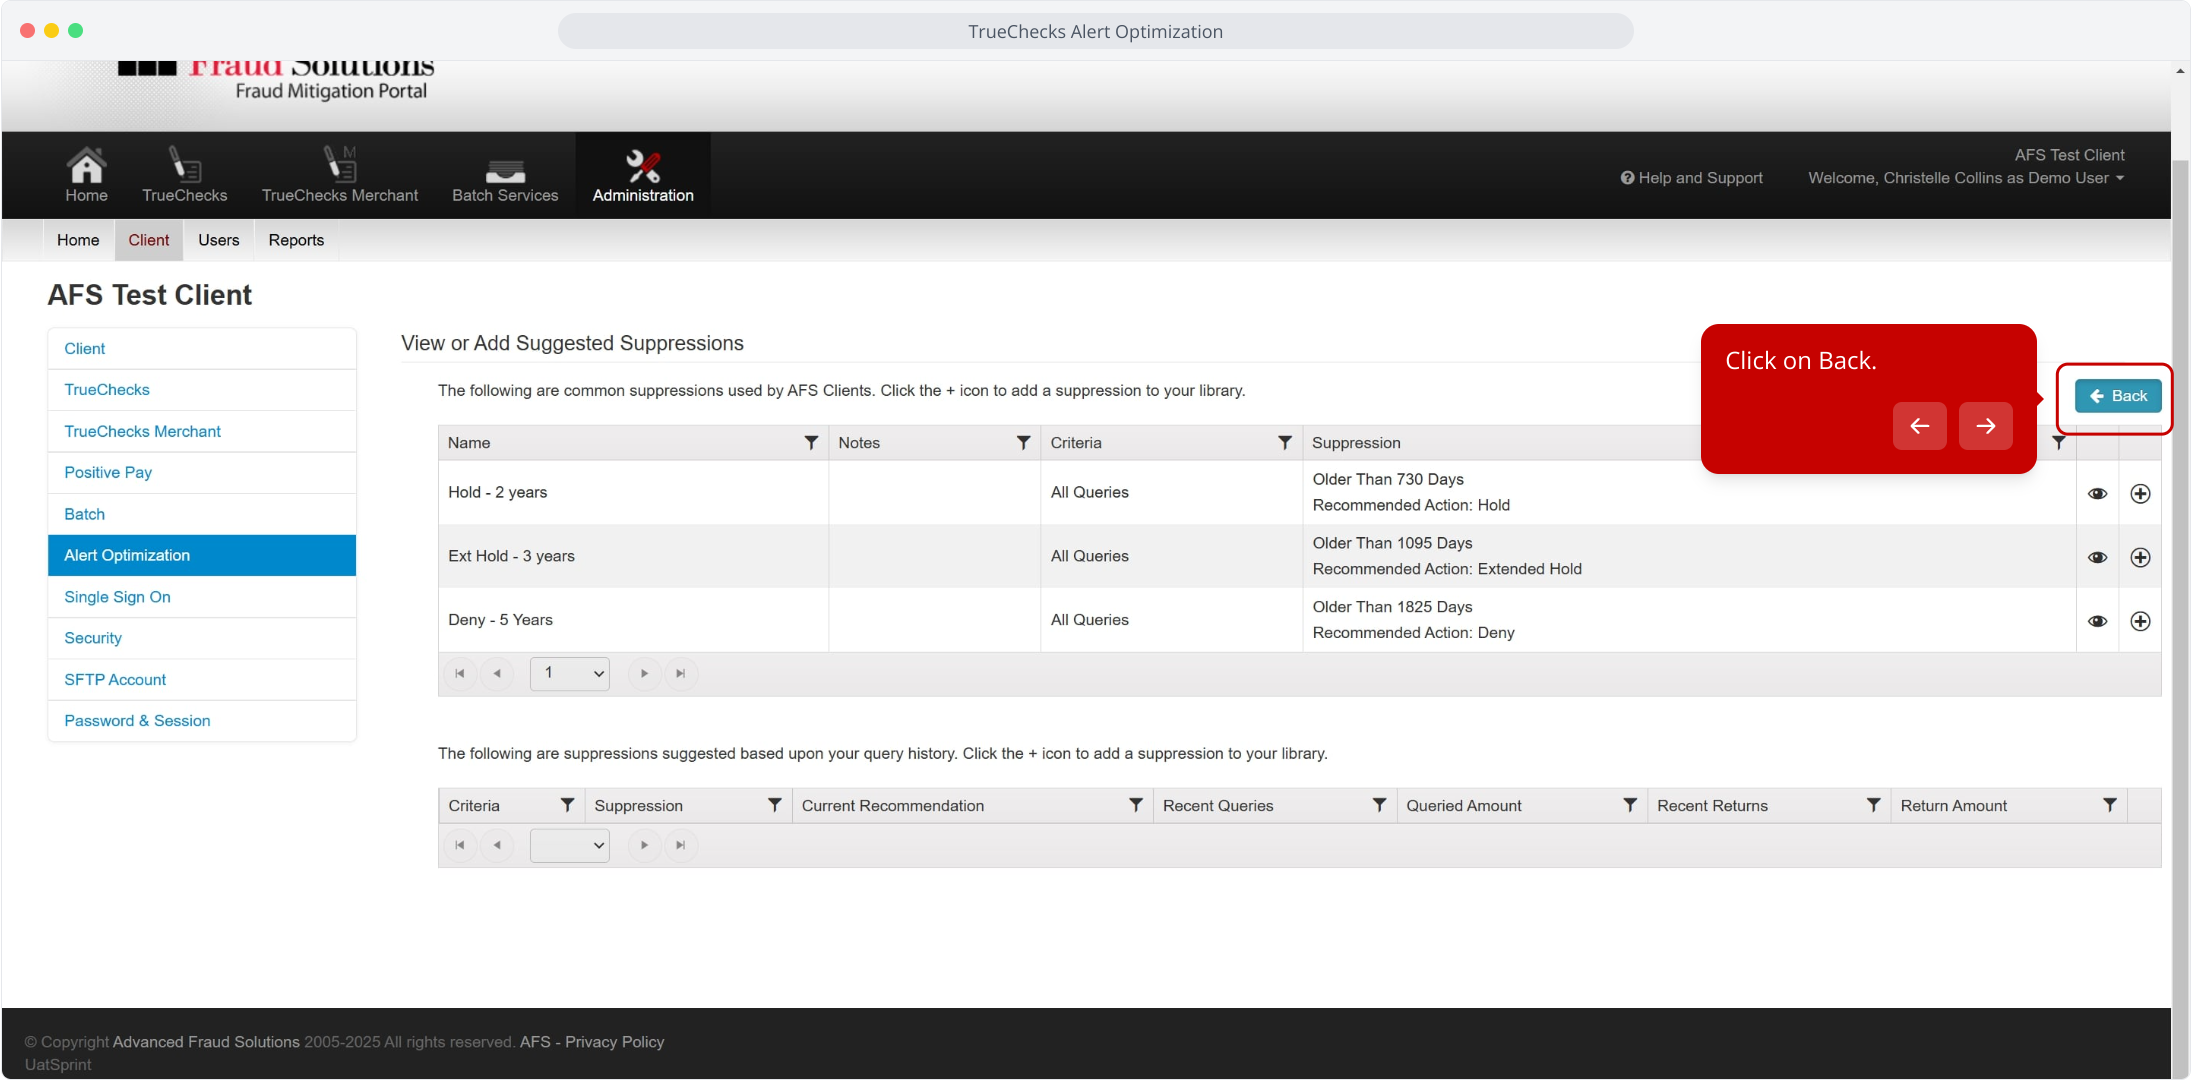
24. Click on Back.
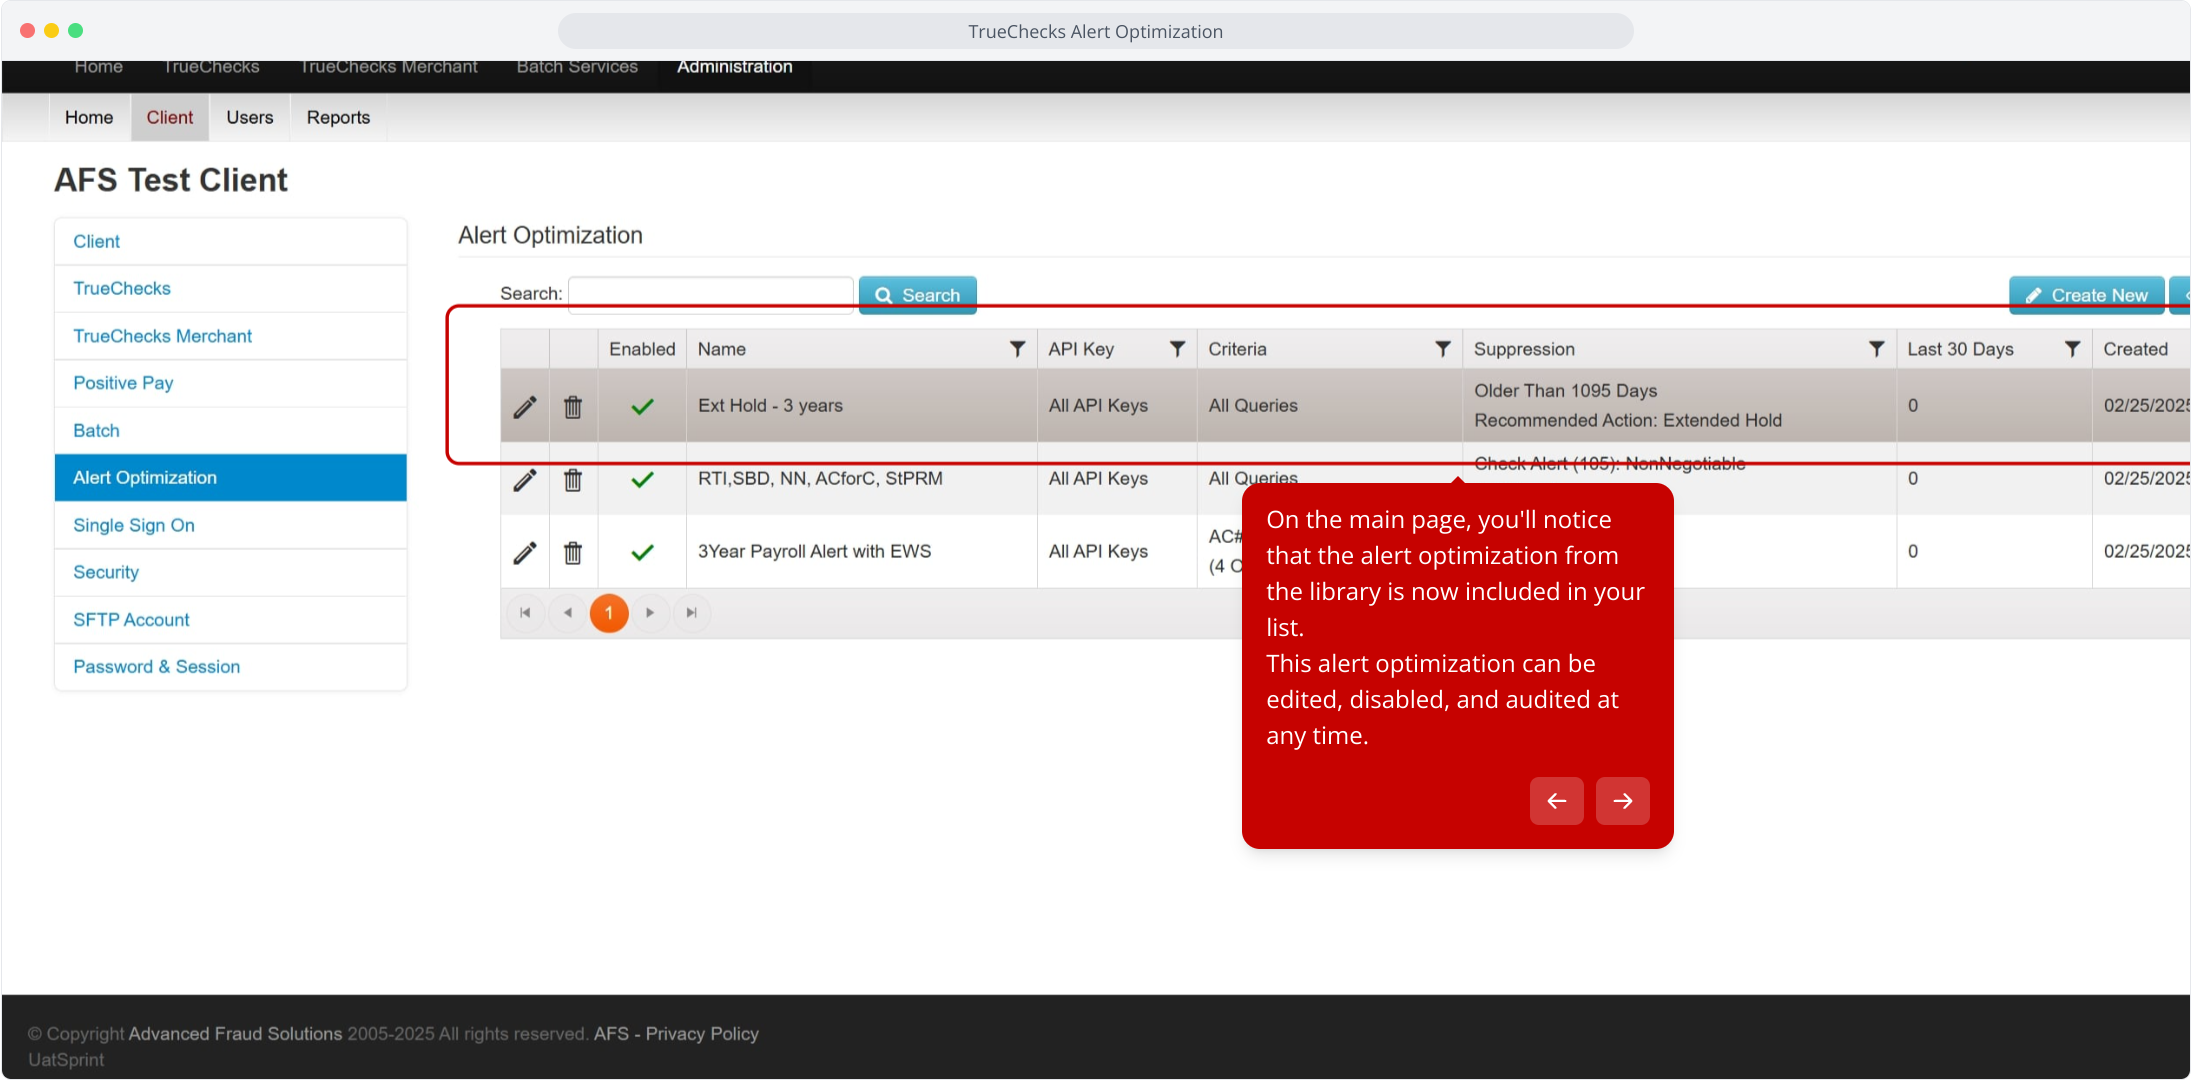
25. On the main page, you'll notice that the alert optimization from the library is now included in your list.
This alert optimization can be edited, disabled, and audited at any time.
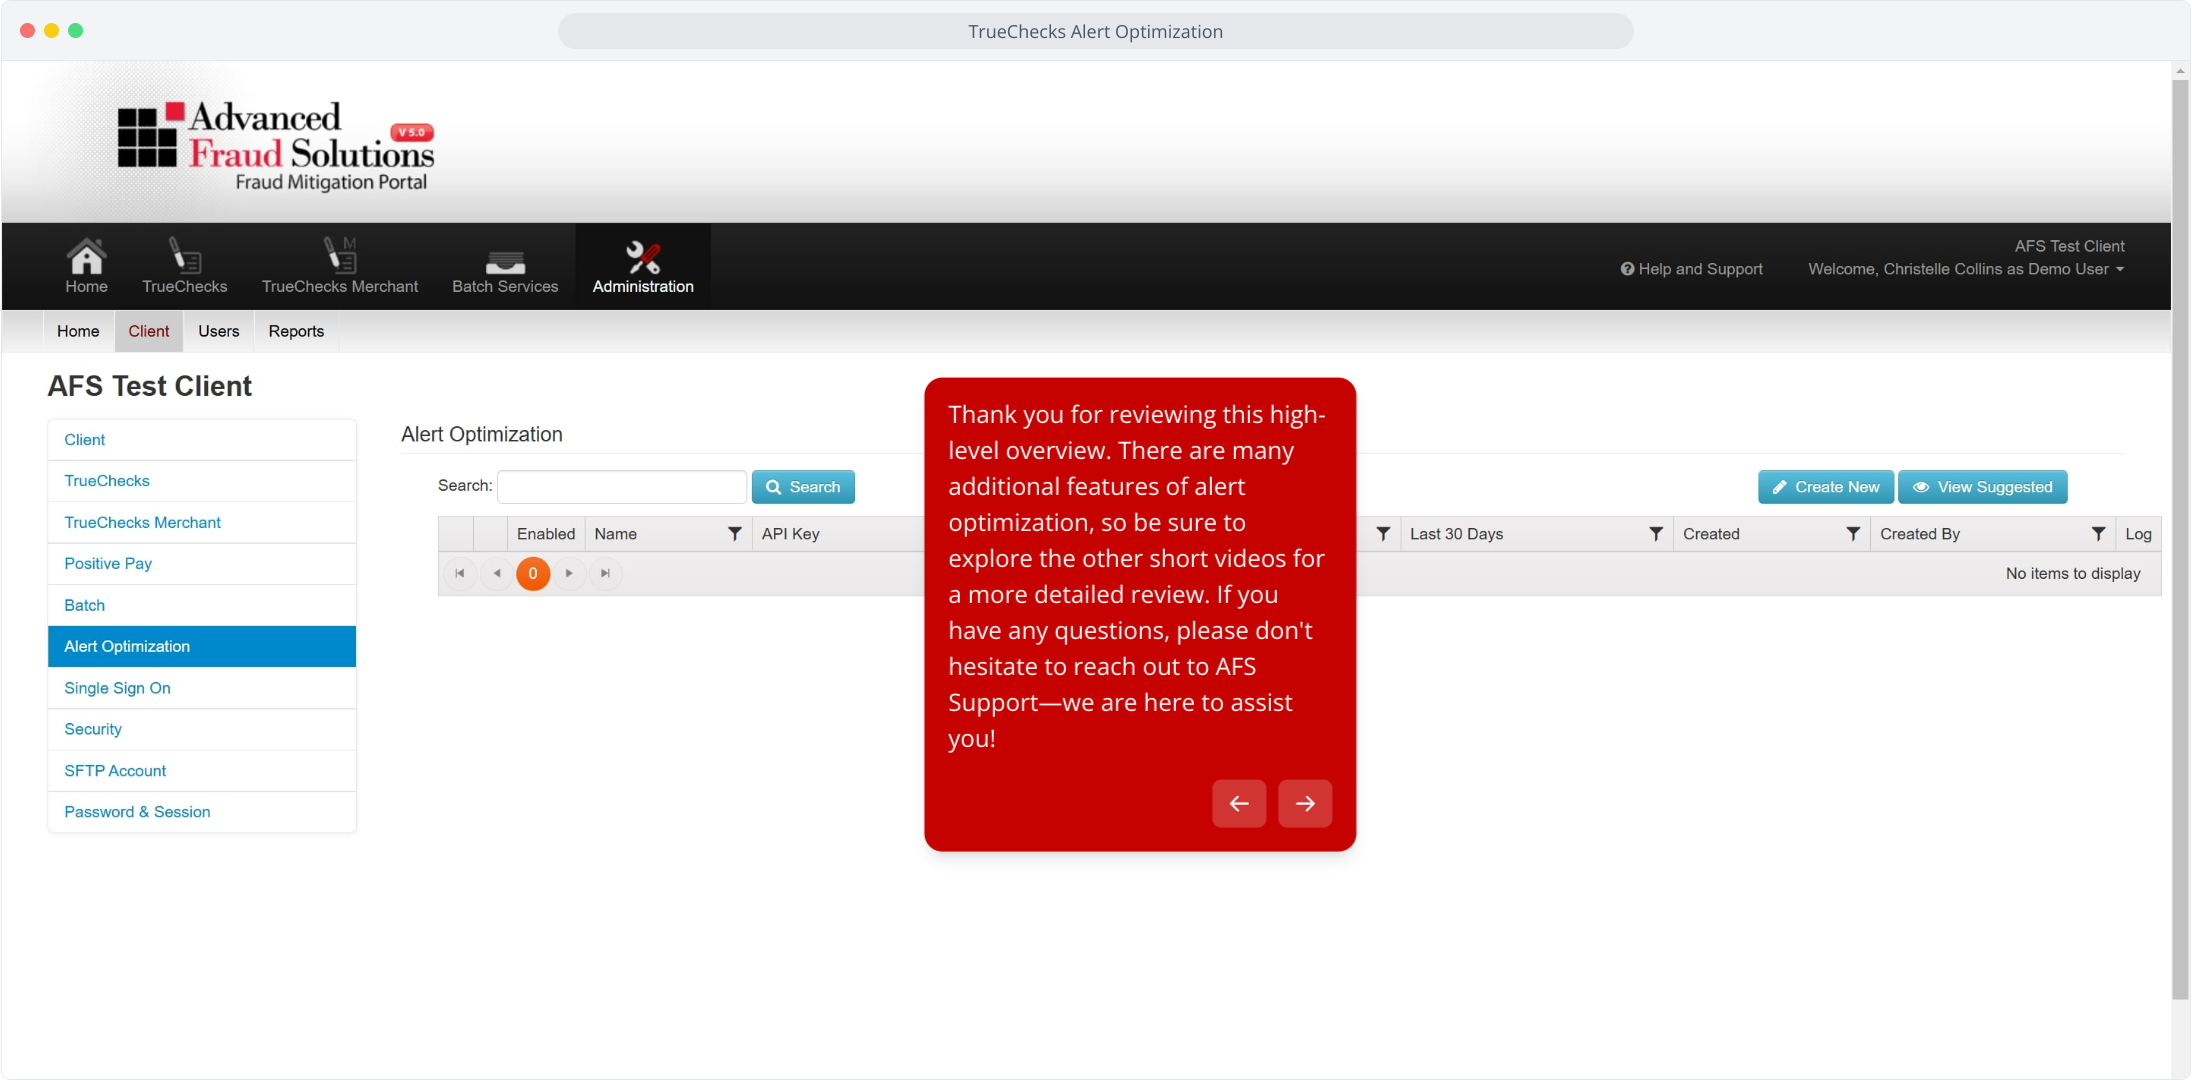
26. Thank you for reviewing this high-level overview. There are many additional features of alert optimization, so be sure to explore the other short videos for a more detailed review. If you have any questions, please don't hesitate to reach out to AFS Support—we are here to assist you!
27. Enjoyed the guided demo?
Alert Optimization FAQ
Why did we change Alert Suppression to Alert Optimization?
You may or may not have noticed, but we've updated the name because we’re doing more than just suppressing alerts—we’re optimizing your workflow and your time. This update gives you more control, better efficiency, and smarter ways to manage your alerts.
Why should FI users explore Alert Optimization?
The new alert optimization system is more powerful, flexible, and user-friendly. It allows for more precise, targeted optimization rules, enables easier management, and introduces features like shared public optimizations and a 30-day lookback to review impact before finalizing changes.
How does Alert Optimization improve operations?
Alert Optimization allows Financial Institutions to have alerts display that you deem valuable and remove the unnecessary alerts for a more fine-tuned workflow. This enables fewer distractions and more focus on important risks.
What happens to the alerts I optimize?
Optimized alerts won’t trigger notifications or clutter your dashboard. They will be filtered based on your preferences so that only critical, high-priority alerts surface. You remain in full control of what you see, ensuring your workflow remains streamlined and efficient.
Do I need to take action?
No immediate action is required. Any previously existing optimizations will be automatically migrated. However, we recommend reviewing them to take advantage of new features like consolidation and advanced filtering.
How does this revamp improve efficiency?
You can now combine multiple optimizations into one rule, search alerts more effectively , and disable optimizations without deleting them. The update also reduces the number of individual rules needed to achieve the same results.
How It Works
What exactly gets optimized, and how do I control it?
You define optimization rules based on account numbers, alert types, transaction amounts, and more. Optimized alerts won’t trigger notifications, making it easier to focus on actionable risks.
How can I use pre-made optimizations?
AFS expert advisors have curated a Public Library of common alert optimizations. You can easily browse and apply these pre-configured rules to streamline your setup and benefit from industry best practices. These public optimizations help you get started quickly and ensure you’re leveraging the most effective alert strategies.
What’s the difference between ‘skip duplicate detection’ and ‘optimize duplicate alerts’?
- Skip duplicate detection prevents the system from marking new items as duplicates.
- Optimize duplicate alerts hides alerts generated from past duplicate detection.
Can I create pre-set optimization profiles?
Yes. AFS provides pre-configured optimization profiles (e.g., Conservative, Moderate, Aggressive) in a public library that clients can choose and apply. These profiles are designed based on industry best practices, allowing for quick and effective alert optimization without requiring manual setup.
Practical Use Cases
What does the 'Skip Duplicate Detection' feature do and when should I use it?
The 'Skip Duplicate Detection' feature prevents the system from marking new items as duplicates. This can be useful in cases where legitimate transactions are mistakenly flagged. However, before enabling this feature, it's important to assess why duplicates are occurring and whether filtering them out is the best approach for your institution.
Can I disable optimizations without deleting them?
Yes. You can toggle optimizations on and off without permanently removing them.
Behind-the-Scenes Insights
What’s the 30-day lookback?
It’s a report that simulates how the optimization would have impacted alerts over the past 30 days. This helps you assess effectiveness before enabling a rule.
How does the system prevent mistakes?
- The 30-day lookback ensures you can review changes before committing.
- A full audit log tracks every optimization, including changes and usage history.
Can I see what would have been optimized before enabling a rule?
Yes. The system provides an impact preview based on past alerts.
What if I optimize too much and need to adjust?
You can review the 30-day lookback report before finalizing changes, ensuring no critical alerts are missed.
How do I check if my optimization settings are working?
The 30-day lookback allows you to see how many times an optimization was applied and review affected alerts before finalizing changes.
Future Enhancements
What’s next for Alert Optimization?
Future improvements include additional optimization profiles and filtering options. We look forward to receiving your feedback to continue to make Alert Optimization effective.
Can I override recommendations to always hold or always deny?
Currently, the system allows for allow-listing and block-listing. Plans are in place to add more granular overrides.
Comments
0 comments
Please sign in to leave a comment.